
runna10/iStock
Picture this: You’re enjoying lathering up in your shower until you turn off the water, step out to your vanity, and realize there’s a giant puddle of water on the floor. Suddenly, your peaceful morning has turned into a soppy mess.
It doesn’t have to be this way! Bathroom design, welcome to the modern age—where homeowners are embracing separate wet and dry zones, allowing space to bathe and get ready, with no wet floor to worry about.
“This setup creates a seamless, contemporary look that has been growing in popularity over the past several years,” says Jere Bowden, an interior designer in Auburn, AL. “You have a lot more design freedom with a wet and dry room layout, which makes this an attractive option for many consumers.”
Here’s a look at why zoning your bath could work to your advantage and make getting ready in the morning a breeze.
Wet vs. dry
You may have seen a bathroom zoned with wet and dry areas in a hotel, where the idea first became popular. You can do it at home, but we’ll be straight with you: You’ll need a fair amount of room.
“Wet and dry zones can be difficult in a small space because you’re dividing a showering space from the rest of the bathroom. A larger bathroom is best suited for this layout,” says Joe Murphy, interior design specialist at The Shower Head Store. (Space-challenged homeowners may want to consider an all-wet bathroom, but more on that later.)
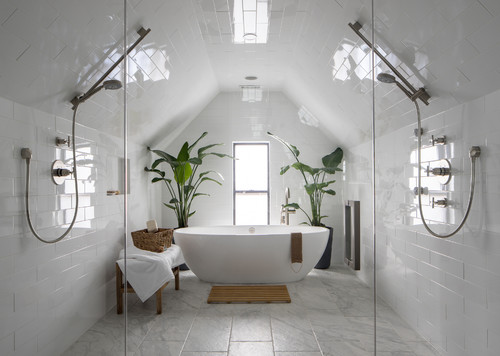
So let’s say you have a bigger bathroom with an open layout—or you can make it that way. On the wet side, you have your tub and shower; on the dry side, toilet and sink/vanity. (Yes, there is still water on the dry side, but it’s contained! Right?)
The wet and dry areas should be separated, but in a way that allows natural light to flow through the whole space. You can put up a glass panel for the bath/shower area, for example, and waterproof the floor so moisture doesn’t escape.
“The wet/dry setup in a bathroom is when the shower and tub are together, behind a glass wall. This is different from a standard dry bathroom where the shower has its own four walls and the tub is free-standing in another area,” explains Jamie Janson Wietholter, owner of SoFlo Home Design in Florida.
“The advantages of designing a bathroom like this are usually you can gain a larger shower since the shower and tub are encompassing one space, and it gives the feeling of more room. The need for only one glass wall also lets a ton of light in.”
One disadvantage, however, is that it can be harder to keep the shower area warm and steamy in an open concept space.
“Heat rises and escapes unless you go all out and do a steam shower wet space and the glass enclosure meets the ceiling,” she says. “Now that is the showstopper in wet space design.”
Making a wet/dry bathroom work for your space
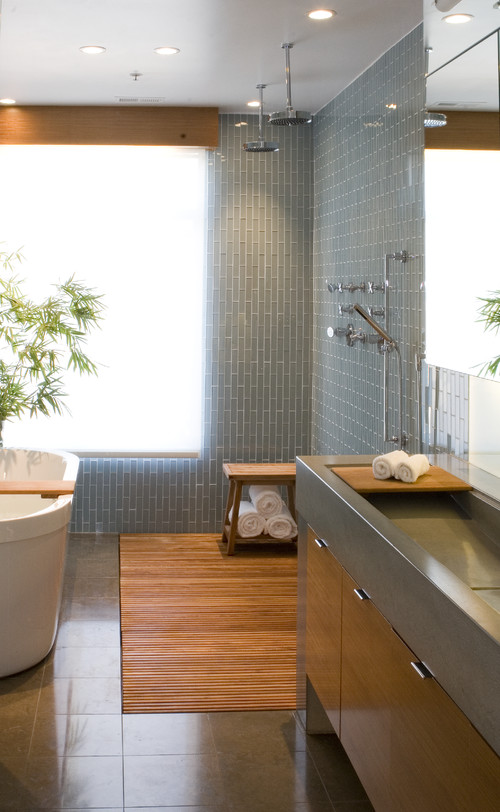
If you don’t like the idea of zones, or just don’t have the space, you can create a bathroom where the entire space is waterproof. (You may have seen these if you’ve traveled to Europe or Asia where they’re popular.)
“Wet spaces intentionally have no curtains, shower doors, or splash panels so that water can easily flow around the space,” says Eva Leone, projects director for interior design at Lawson Robb. “Due to there being no barrier separating the bath from the surrounding space, the entire wet space has to be waterproofed.
“A small, well-ventilated bathroom is ideal for a wet room as it creates more space and maximizes design opportunities,” she adds. “This means that you can gain more space in other areas of your home, such as expanding the size of a bedroom or installing a larger shower.”
Bowden agrees: “A wet room layout can work well in smaller bathroom spaces, optimizing space usage and creating a more expansive look and feel. You don’t have to worry about shower doors or a shower tray, which can break up the space.
“In general, you have a lot more design freedom with a wet room layout, which makes this an attractive option for many consumers,” he adds.
How to get in the zone

There’s some work to be done if you’re interested in creating these types of bathrooms—especially for the wet zone, which will need to be waterproofed to prevent moisture and mildew from escaping. It can be a bit more expensive than your typical bath setup, running about $21,600 for 144 square feet compared with $18,000 for a traditional bathroom in the same amount of space.
“A lot of homeowners are looking for the seamless shower design that allows you to walk right into the shower without a shower curb,” Wietholter says.
To do this, the shower floor has to be sloped to a central drain, which involves a fair amount of labor and materials.
“In a condo, you might not be able to accomplish this design because moving a drain is impossible when the stack is shared with other units,” he continues. “But in a single-family home, the wet room bathroom design can be done with no problems.”
Leone adds that her clients often request that underfloor heating be included in a wet bath setup, as it helps water evaporate faster.
The post In the Zone: How to Separate Your Bathroom Into Wet and Dry Areas—and Why You’d Want To appeared first on Real Estate News & Insights | realtor.com®.
No comments:
Post a Comment