Saturday, February 29, 2020
Friday, February 28, 2020
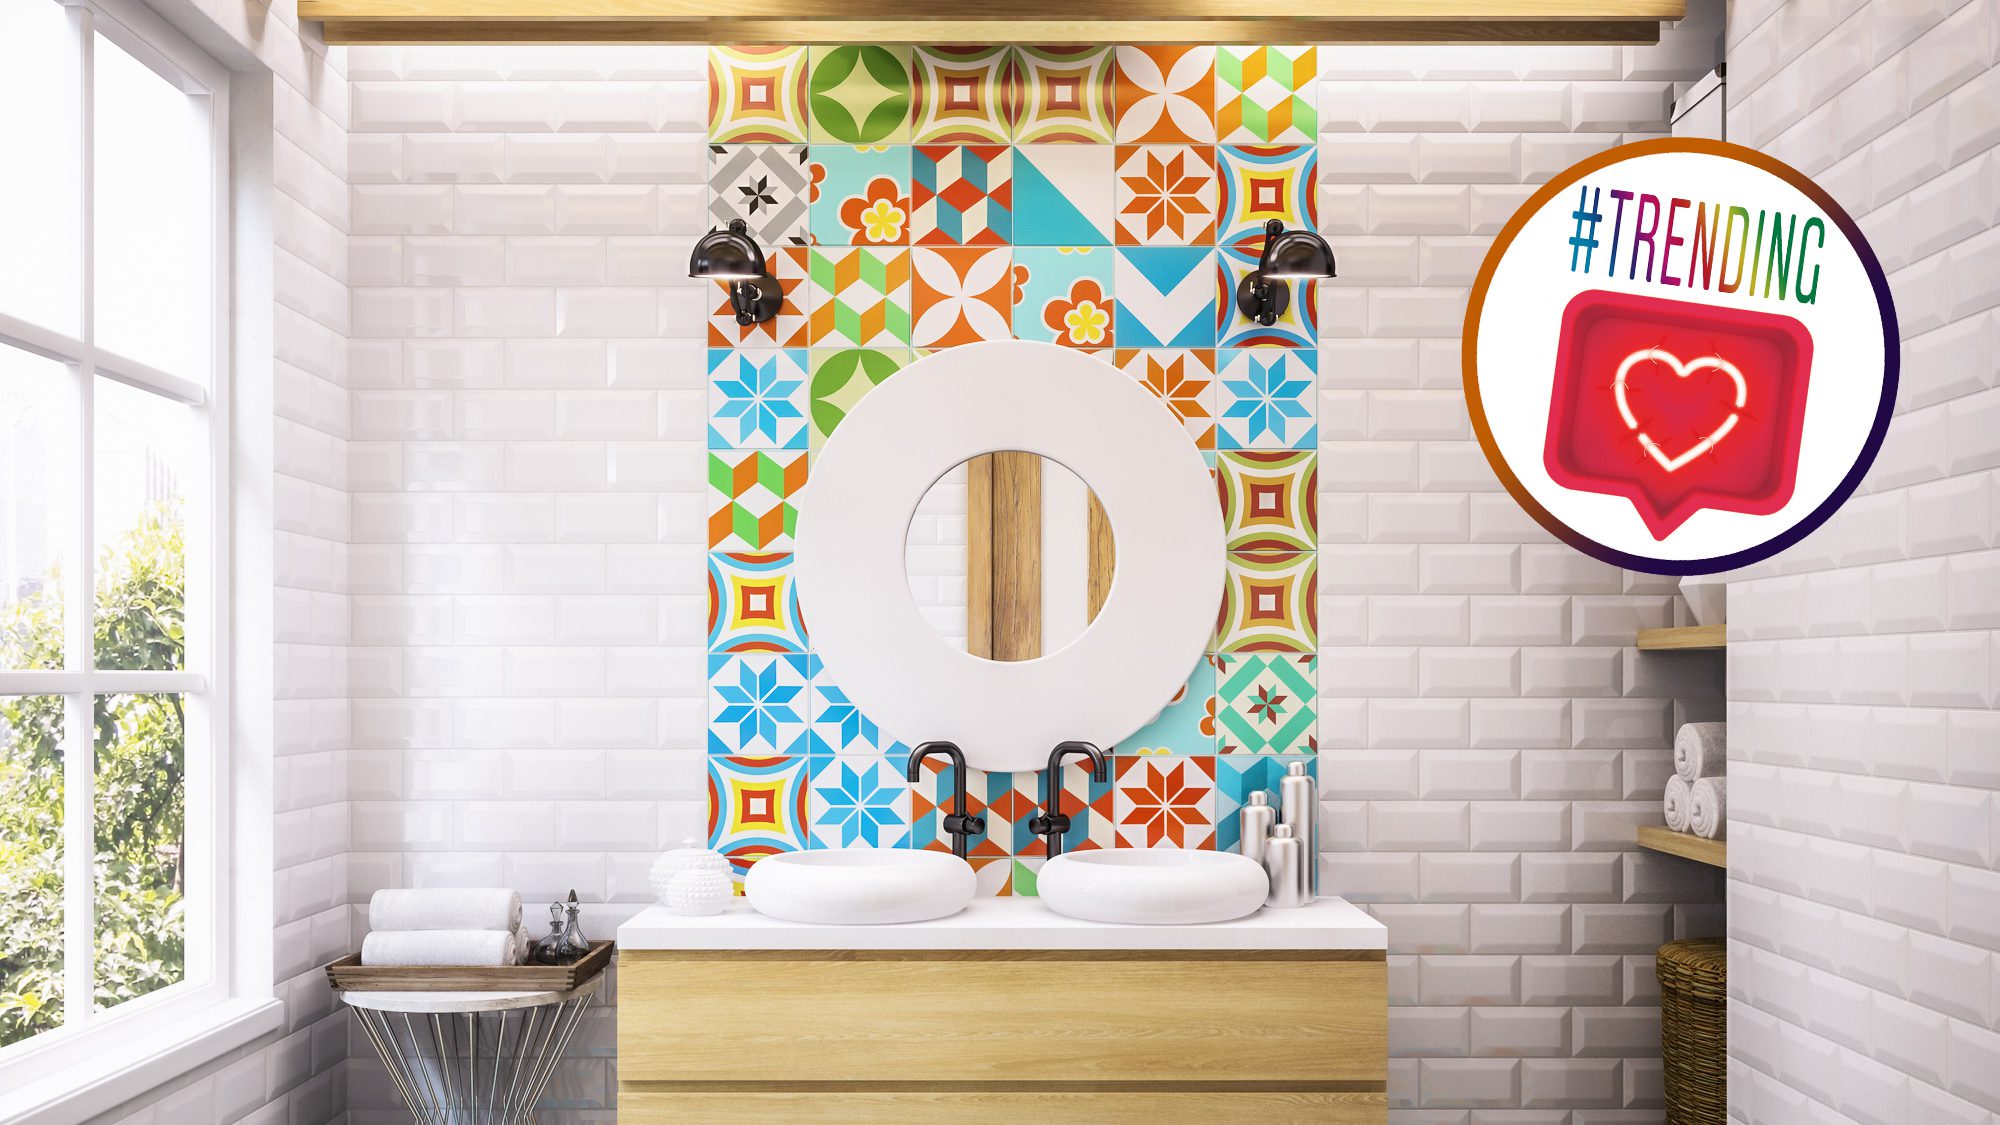
5 Unexpected Decor Trends From Instagram That’ll Instantly Upgrade Your Bathroom
realtor.com
If the shower curtain is the only exciting thing happening in your bathroom, then you’re going to love this week’s top trending decor lineup. As always, we’re back at it with our weekly series on the most popular interior designs on Instagram—this time bringing you the best of upscale bathrooms.
With timeless furniture pieces and original tile designs, these top five unexpected new trends are sure to bring the swagger back into your bathroom.
1. Vanity stool
 : @kerrykirkphoto
  : @curiousdetails
You don’t have to be Marilyn Monroe to get your very own vanity stool, and if you have the space for it, adding one (like we see in this photo from @alexandra.killion.interiors) will do wonders for your bathroom.
“Because bathrooms have become larger, we’re seeing expansive lengths of double vanities with a makeup center in the middle,” says Ana Cummings of ANA Interiors.
“The counter is usually lower, and as such it’s perfect for a petite stool that can slide under the counter when not in use,” she adds.
Get the look: Snag a similarly elegant vanity stool for your bathroom from Wayfair.
2. Ladder shelving
 Bathroom goals by @brepurposed
 What do you think?
Gone are the days of ugly plastic bathroom storage. Make your bathroom shelving do double duty by choosing something timeless, like this ladder shelving featured by @brepurposed.
“Ladder shelving is a smart solution for getting more storage, while also taking your bathroom design to the next level,” says Rebecca Breslin, design manager for Wayfair Professional.
“The leaning ladder look also doesn’t crowd your space or obstruct your sightlines, as the top few shelves aren’t as deep as the lower shelves,” says Breslin. “Add rattan baskets, a plant, or candles to really build out the look.”
Get the look: Shop this driftwood brown ladder shelf from Target.
3. Patchwork tiles
 Home Decor
Tiles don’t have to be boring and square; upgrade the look and feel of your bathroom by opting for something more sophisticated and unexpected, like these patchwork musica tiles featured by @hakuna_matata_home.
“The patchwork musica tile is a spinoff of the maximalist pattern trend, finding its way into bathroom design,” says Breslin. “The tiles lend themselves toward old-world patterns, tonal colors, and various shapes and sizes. The mix is playful and visually engaging, a statement piece for any bathroom.”
Get the look: Add custom tiles to your bathroom by shopping the selection of handmade patchwork tiles on Etsy.
4. Moroccan mirrors

Forget round or rectangular mirrors, and opt instead for something a bit more unusual, like these gorgeous Morrocan-inspired mirrors featured by @jallsopp.
“Moroccan arched mirrors are an exotic, fresh alternative to the typical rectangular mirror, and they give the space a more custom feel as well,” says Vicki Liston of On the Fly DIY. “Pairing two gives a satisfying, symmetrical look.”
Get the look: Pick up a set of Moroccan mirrors for your home from Wayfair.
5. Wallpaper meets tile
https://www.instagram.com/p/B8wotaLHH9H/?utm_source=ig_web_copy_link
If you’ve been wondering whether to refinish your bathroom walls in tile or paper, why not do both? We’re loving this elegant design of tile meets wallpaper in the home of @thelinenrabbit.
“A bathroom is so much easier to clean when the tile is wrapped around all walls,” says Cummings. “Using wallpaper above adds an elegant and formal touch, and the combination of pattern and color can really make your bathroom shine.”
Get the look: Find the perfect ivory subway tiles for your bathroom from the Tile Shop, then finish the look with a floral paper from Wallpaper Direct.
The post 5 Unexpected Decor Trends From Instagram That’ll Instantly Upgrade Your Bathroom appeared first on Real Estate News & Insights | realtor.com®.
Whack That Weed! How To Keep Creeping Charlie Out of Your Garden

Roel_Meijer/iStock
No, it’s not a nickname for your stalker neighbor across the street. Creeping Charlie is a rapidly spreading weed vine with round, scalloped leaves and small, light-blue flowers. The weed also goes by several names, including ground ivy, hedge maid, gill-on-the-ground, and lawn ivy. No matter what you call it, it is one invasive plant.
“Of all the lawn weeds a homeowner will have to deal with, Creeping Charlie is probably the worst perennial weed,” says Richard Hentschel, an educator at University of Illinois Extension.
Why? It can take over your lawn and garden and make it difficult to control your landscape. As it grows, it can overtake and strangle other plants in its path. And it’s especially hard to control if it gets into your flower bed or lawn.

Photo by Cultivate
Throughout history, this low-growing weed has been used in everything from beer to salads to herbal medicines. But it’s no good in your garden. Controlling Creeping Charlie can be a real challenge for homeowners, but here are some ways to curtail the creep.
Method 1: Pull out the weeds by hand
This weed is one tough bugger to battle because it spreads through seeds, roots, and stems. And simply mowing Creeping Charlie only helps to spread the weed.
“To get rid of it naturally, one of the best ways to do it is to hand-pull after a heavy rain or after absolutely soaking the lawn. This makes it easier to pull out the entire structure of the plant, roots and all,” says Kevin Espiritu, founder of Epic Gardening.
Espiritu says an intensive hand-pulling session should take care of most of it, but advises keeping an eye on smaller plants popping up in the next few weeks. Yanking those out immediately should do the trick, he says. But make sure not to leave any behind, because one fragment can reroot and give rise to many more new plants.
“Having zero Creeping Charlie in a lawn or landscape is the dream of most homeowners,” he says.
Method 2: Keep a well-fed lawn
Creeping Charlie thrives in lawns that are poorly maintained, particularly in lawns that are thin and not very robust. So, bulk up that lawn! Experts say a well-maintained lawn can help fend off Creeping Charlie.
“When you’re trying to control Creeping Charlie, you need to prevent it from returning by either improving the density of the grass growing in that area or planting something else that can outcompete it,” says Kristin Krokowski, commercial horticulture educator at the University of Wisconsin–Madison Extension Waukesha County.
Experts suggest mowing regularly—to a height of 2 inches to 3.5 inches—and fertilizing, watering, and overseeding in the fall.
Method 3: Try soil solarization
The weed thrives in shade and high-moisture environments, such as under trees and shrubs. Soil solarization is a pesticide-free process that burns out soil-borne weeds using a concentrated amount of heat from the sun.
In the hot, sunny months, soil solarization can be used to control Creeping Charlie. Simply water the soil until it’s wet, place a clear plastic sheet (like a plastic dropcloth used by builders or painters) over the soil, bury the edges so it’s secure, and let it sit for at least four weeks. Then remove the dead weeds.
Method 4: Apply weed preventer
It is best to target Creeping Charlie in either the spring or the fall using a broadleaf herbicide containing triclopyr or dicamba—the chemicals can kill this weed but won’t harm your grass. Experts suggest fall as the perfect time, since the weeds are actively growing and the herbicide would reach the roots targeting the entire plant. However, Hentschel says the best time to treat your garden with herbicides depends on your climate, so he advises homeowners to contact their local agricultural extension office for more information.
And don’t bother with homemade DIY potions. One common remedy is to make a solution of Borax, but some experts advise against it because Borax can infiltrate the soil and hurt your lawn or other plants. Unless you use scientific precision in mixing and applying the solution, you can end up with a case of boron toxicity in your soil.
The post Whack That Weed! How To Keep Creeping Charlie Out of Your Garden appeared first on Real Estate News & Insights | realtor.com®.
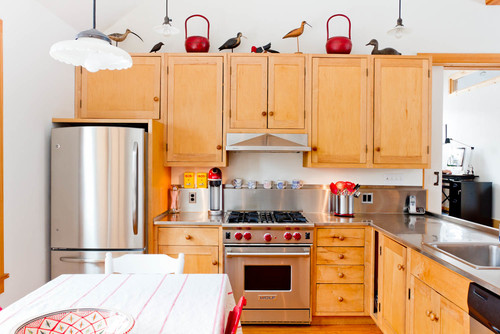
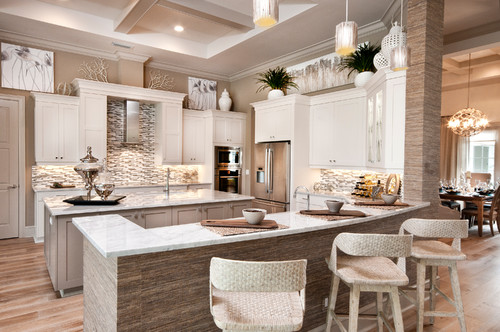
9 Creative Ways to Decorate the Most Forgotten Space in Your House

NelleG/iStock
What’s the one area of your home that’s likely off your radar and just gathering dust? It’s that nameless space above your upper kitchen cabinets.
Unless your cabinets extend all the way to the ceiling, you likely have some space above your cabinets—and we’re here to point out that giving this spot a little attention can make a big difference in terms of the statement your kitchen makes.
A word of caution, however: Whatever style you decide to embrace, there are certain items to avoid placing here. Like what? For one, those once-popular dried flower arrangements. These dusty looks are retro in a bad way, and the heat from your stove can cause them to crumble and drop into the dinner you’re prepping (ick!).
“This look is dated and stuffy and draws too much attention,” warns Anna Shiwlall, owner of 27 Diamonds Interior Design.
Ditto for a bunch of tiny accessories.
“Small dust-catchers look cluttered, and they don’t do anything to catch the eye—and they’ll make you wonder when they were last cleaned,” says Darla DeMorrow, an organizing pro and author of the new book “The Upbeat Organized Home Office.”
Here’s more on styling the tops of your kitchen cabinet so this oft-forgotten area can make a surprisingly huge impact.
1. Highlight a quirky collection
Most of the time you’ll see a row of platters or baskets on cabinet uppers, but these types of collections can be sort of a snooze. Instead, dig deeper into your accessories to curate a look that’s a little striking or even quirky. Juju hats, vintage sieves, and earthenware pitchers are all worthy candidates.
2. Hang some art
Graphic prints or black and white photographs both work well in this space. And if your art is food-themed, then all the better.
3. Add bright paint
 It’s the little things that make all the difference. Loving our newly lit lime green kitchen
  thankful for my father in law’s handy skills and thrifty ability to always find what we’re looking for who installed our new overhead light – before we had harsh fluorescent tube lighting and now it feels so warm
  Julian also painted our bathroom (I almost said we haha). Only took years to finally get around to doing! . . . #torontoloft #loftkitchen #limegreenkitchen #hardloft #limegreen #homeimprovements #lovemykitchen
Styling this space can be easy and affordable—in fact, all you need is a single can of vivid paint to make it pop. Define the area with a color you might not normally use elsewhere. (Lime-green is fashionable and attractive in small doses.)
4. Create cubbies

Adding an extra shelf above your kitchen uppers or splurging on built-in cubby holes that also light up are another couple of ways to create a stylish spot in this room, notes Shiwlall.
“If your cabinets are hung 12 inches or more from the ceiling, you can order coordinating pieces to slot in, and with some minor carpentry and paint, they’ll look custom,” notes DeMorrow.
Fill your new display areas with something you want to highlight, such as special pottery you’ve collected from your travels or items that need protection like antique glass.
5. Add a sign
Chip and Joanna Gaines–style signage is the perfect joyful antidote for that sad empty space. A retro or distressed sign fills the nook and channels a decor theme, modern farmhouse or otherwise.
6. Add plants
![]()
Green plants are inviting and crisp, which is why windowsill herb gardens are so popular in kitchens of every size. You can mimic this type of garden by elevating plants to your cabinet uppers. Even easier: Choose good-looking fake plants like spider ferns, aloe, or caladium. You won’t have to water them, and they’ll always look fresh.
7. Install new windows

If the structure of your home allows it, knocking out the wall above these cabinets to create a new set of windows is a creative idea that lets in more light.
8. Continue your tile

Photo by Kristin Lam Interiors
“Never underestimate the power of pattern and color,” reminds DeMorrow.
To that end, drawing the eye upward is easily done with sticker tiles in a bright shade as seen in encaustic patterns. Or simply connect the tile you already have on your backsplash to this upper wall for a wraparound designer look, she adds.
9. Put in wine storage

Who needs a wine cellar when the spot above your fridge or upper cabinets will do nicely? Installing wine cubbies is a relatively easy DIY project, though you can also put in ready-made wine racks to hold your collection.
The post 9 Creative Ways to Decorate the Most Forgotten Space in Your House appeared first on Real Estate News & Insights | realtor.com®.
Thursday, February 27, 2020
Want to Become a Superhost? Avoid These 7 Guest Room Mistakes

idal/iStock
If you’re lucky enough to have a spare room, in-law suite, or second home, there’s a good chance you’ve considered renting it out. Put a bed in there, post it on Airbnb, and count the cash rolling in, right?
Sorry, folks—it’s not as simple as that. Whether your guest suite is for friends and family, or you’re planning on hosting guests for money, there are a few do’s and don’ts when it comes to decorating the space.
Here are the top guest space faux pas you’ll want to avoid—especially if you’d like a good review (or want to see your friends again).
1. Dark decor
Everyone likes having a cozy space to rest, but there’s a fine line between decorating a space so that guests can sleep late and making it look like the Addams family got hold of it. To keep your guests happy, skip the dark wallpaper or paint, and ditch any furniture you didn’t know what else to do with.
“Too often, homeowners tend to put their ‘leftover’ furnishings in the guest room because it’s not a primary room,” says Doreen Amico-Sorell of Sorell Interiors. “But that’s no reason to have broken, dingy, or gloomy fixtures and furniture anywhere in the home.”
2. Bad lighting
Bad lighting can make even the nicest guest room a gloomy cave. Supplement any overhead lighting with bedside and reading lights—and make sure they’re up to par! You won’t get good reviews for flimsy lamps or burned-out bulbs.
3. Missing outlets
One of the first things everyone needs after a long day of travel is a place to charge their phone. If you plan on hosting people born in this century, you can count on their need for reliable working outlets (preferably more than one).
“Whether it’s my friends visiting with all their devices or my parents with their CPAP machines, having outlets by each nightstand has made me a hero,” says Jackie Schagen of Jackie Schagen Design.
Even if your room isn’t equipped with a million outlets, pick up a power strip to give your guests plenty of options.
4. No privacy
As a host, making guests comfortable should be priority No. 1—and comfort includes a certain level of privacy.
“Not all houses have a dedicated guest room, but whether it’s a room or casual space, guests should be made to feel welcome,” says Amico-Sorell. “And that can only happen with privacy.”
Make sure your guests have a way to cover the windows, close the door, slide out a room divider, or whatever is needed to comfortably relax while visiting.
5. Withholding the Wi-Fi
Withholding Wi-Fi and other important details (like the access code on the front door) is only going to accomplish one thing: making your guests really, really annoyed.
“Real love means not having to ask for the Wi-Fi password,” says Schagen.
Not providing these details in advance might also mean you receive a nonstop stream of texts filled with questions. Make everyone’s life easier and leave out a cheat sheet of all the numbers and passwords your guests need to know during their visit.
6. Scratchy or stained linens
Cheap fabric or mystery stains are a surefire way to diminish your star rating, whether the guests are paying or not.
“There’s no excuse for cheap, scratchy sheets or not enough towels,” says Amico-Sorell. “These products can be acquired at a very reasonable price— there’s no reason to treat guests like you don’t want them there.”
7. Not providing cleaning products
People make messes and accidents happen. Rather than being the one to clean up a colossal mess when your company leaves, discreetly include a few basic cleaning products (toilet brush, antibacterial wipes, plunger), toiletries, extra toilet paper, and waste bins around your guest suite.
The conscientious guests will take the hint, and be glad to have a way to clean up after themselves without having any awkward conversations.
The post Want to Become a Superhost? Avoid These 7 Guest Room Mistakes appeared first on Real Estate News & Insights | realtor.com®.
Help, There’s a Peloton in My Living Room! Home Gym Designs You Won’t Hate

miodrag ignjatovic/iStock
Getting to the gym can seem so hard, so it makes total sense that the Peloton bike, treadmills, rowing machines, and other exercise equipment have taken homes by storm.
The problem? As great as they might make your body look, exercise equipment is darn ugly. No matter how sleek and well-designed these hunks of metal are, it’s hard to incorporate them gracefully into your home decor, especially since many of us don’t have whole rooms or huge amounts of extra space to devote to working up a sweat.
Your best bet, say experts, is to embrace the equipment, rather than try to hide it completely.
“You can’t just tuck it in the corner of a room and pretend like it’s not there,” says Marty Basher, a home design and organizational expert at Modular Closets. And after all, “if you don’t put it where you’ll see it on a regular basis, you’ll be less likely to use it.”
The first step is to measure your space carefully before you design around it.
“If you’re banging a wall or brushing up against drapes or furniture, you’ll feel cramped and uncomfortable, so be sure you have about 30 square feet of space to work out in,” he says.
Next up: a little beautification and just a bit of strategic camouflage. Here are seven ways to make your exercise equipment and your room decor play nice together.
Install mirrors
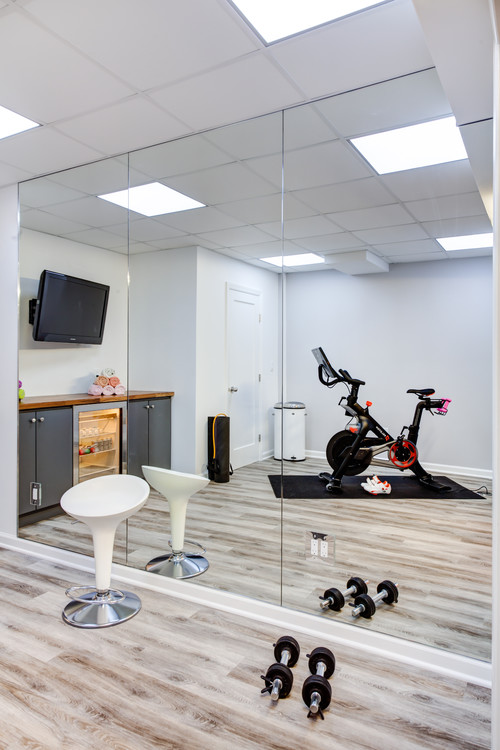
Photo by KraftMaster Renovations
If you have a dedicated space, mirrors are a classic design trick, one that the pros fall back on repeatedly—and this glassy magic can make the space you work out in feel less squeezed and more airy.
“Much the way you’d see in a ballet studio, adding floor-to-ceiling mirrors—or even an oversized one that leans on the wall—can make a room appear larger,” explains Kymberlyn Lacy, principal designer at International Flair Designs. And of course, a mirror next to your rowing machine is a good prompt to check your form as you pull.
Lay carpet tiles
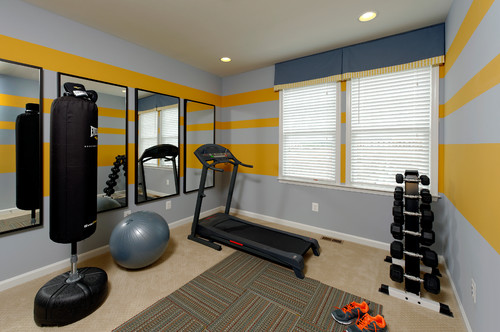
Carpet tiles in a fun pattern or bright color can help define the space you’re giving over to your equipment.
“You might also consider padding for traction, especially if you’re doing high-intensity workouts,” says Lacy.
Basher notes a rug or rubber flooring can also prevent noise from carrying to the floor below.
Paint an accent wall
Photo by Susan Diana Harris Interior Design
Just as strategically placed floor tiles or a throw rug can designate a workout space, an accent wall can also signal your sweat zone.
“You can back your machine into a corner and paint the wall behind it a vibrant shade, or use contrasting paint or wallpaper—and it’ll almost seem like a separate space,” says Basher.
“Or try an inspirational quote near your treadmill as a focal point,” says Lacy.
Add artwork

Photo by Artistic Designs for Living, Tineke Triggs
Draw the eye away from your huffing and puffing, and let it rest on a fabulous print.
“Artwork is another way to create a focal point in the room, and you could match your selection to the exercise theme by picking posters of athletes you admire,” says Basher.
Bring in some green
Photo by Jessica Helgerson Interior Design
This idea can work to hide bulky equipment, but a large plant or potted tree is also a smart design trick that’ll soften a room’s hard edges and add a pop of color. And some plant types can even improve the air quality by reducing toxins.
“A large ficus can partially shield your exercise equipment from view—so don’t worry if you can’t cover the item completely,” says Basher.
Lighten the curtains
![]()
Photo by Black & White Interiors
Dark drapes will block the light and make the space you’re toiling in seem overly grim. Instead, hang sheer panels or remove all of the window dressing so you bring in more light. And by doing this, you’ll make the room appear more spacious and offset the feeling that your elliptical machine is hulking nearby, ready to take over the room.
Divide with a folding screen
A folding screen is another trick that can hide all kinds of flaws, Peloton bike included.
“A decorative screen cordons off your equipment when it’s not in use, and you can use it to hold your towel or jacket so your machine doesn’t become your towel rack,” says Basher.
Another smart bike or rowing machine blocker: a lightweight, free-standing bookcase. Position this item so it divides the space and helps to conceal your workout gear.
The post Help, There’s a Peloton in My Living Room! Home Gym Designs You Won’t Hate appeared first on Real Estate News & Insights | realtor.com®.
How to Increase Your Kitchen Pantry Space Without Breaking the Bank

shcherbak volodymyr/iStock
An organized pantry indicates a happy kitchen. But what happens when you run out of space? All those spices, jars, vinegar bottles, and boxes of cereal have to go somewhere. Once your dedicated storage space reaches max capacity, it’s hard to ignore your kitchen becoming one cluttered mess.
The solution? Get clever with your pantry overflow—try one of our storage alternatives below. With a little creativity, you can carve out the necessary space to house all of the pantry items you need. And the best part? Most of these solutions don’t require any heavy lifting or help from a contractor.
Repurpose a cluttered closet
Can you think of any underused closets in your home that can serve as a pantry?
“I have seen condos in which the homeowners have taken their boots and jackets out of the hallway closet and turned it into a kitchen pantry,” says Nectaria Kladitis, a broker at Re/Max Hallmark Realty in Toronto.
A mudroom or basement could also serve the same purpose.
“This area would be used for bulk purchases of food and consumable items—like napkins, paper towels—and even some not-frequently-used kitchen appliances,” says Andrea Walker, owner and certified professional organizer at Smartly Organized. This kind of space is often referred to as an overflow pantry.
Install floating shelves
![]()
If you haven’t jumped on the open shelving bandwagon yet, consider bringing this trend into your home. Put that empty wall to use and install a few floating shelves alongside the cabinets that already exist.
By moving your plates, bowls, and glasses—which will look pretty stacked together—out of your cabinets and onto floating shelves, you’ll have more room for items that don’t fit in your pantry.
Floating shelves ($199, Pottery Barn) in wood, glass, and metal are quite popular options and don’t cost a lot of money to install.
Most amateur DIYers can source floating shelves from a local home improvement store and install them, but you can also go the custom route.
“Hire a company that specializes in kitchen cabinetry, and ask them to measure, design, and install shelving that fits your needs,” says Caleb Liu, owner of House Simply Sold in Orange, CA.
Warning: Don’t go overboard. Overspending on cabinets is one of the mistakes that can derail your kitchen reno.
Relocate your dinnerware to a hutch
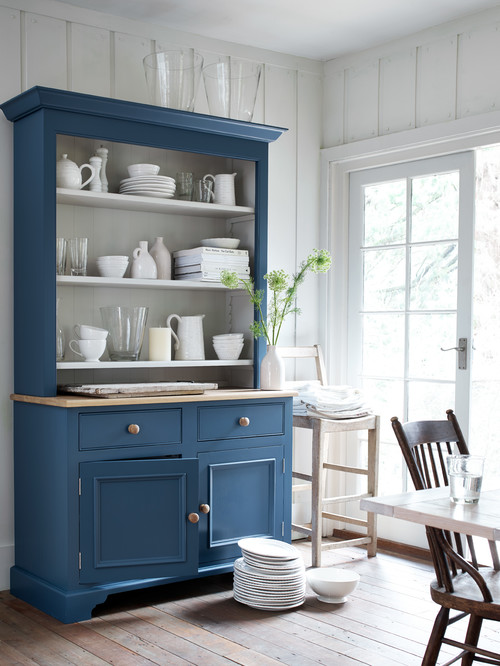
If you don’t want to go through the process of installing shelves, consider purchasing a prebuilt, free-standing storage solution.
“Instead of using your kitchen storage for dishes or glassware, move those items into a hutch, and turn your kitchen cabinetry into pantry space,” recommends Marty Basher, a storage design expert with Modular Closets.
If you have room in your kitchen or dining area, grab this tall hutch ($306, Lowe’s), or source one with a vintage feel from a flea market or estate sale.
Walker says she’s even used an old-fashioned TV armoire.
Get smart with cabinet organizers

Everyone looking to maximize space in their pantry should bring in some cabinet organizers. Walker recommends risers, turntables ($14, Amazon), and bins for all your bottles and jars.
Also, remove the packaging to reduce the amount of space needed.
“So many snack items come individually wrapped that ‘decanting’ them into a bin saves considerable space,” Walker says.
Consider a mobile pantry

Amazon
We bet there are a few spaces in your kitchen that could be used for pantry overflow. One of those spaces is the area between your countertop and your refrigerator. Basher recommends purchasing a narrow metal rolling cart ($95, Amazon), which can slide in and out as you need it.
If you have a lot of space in the center of the kitchen, a mobile kitchen island ($200, Amazon) is another option.
“This type of kitchen organizer can be used to store canned food, spices, cereal boxes, chutney jars, and so on,” says Amalia Otet of Storage Café. “It’s a simple solution that can make a ton of a difference when trying to make a small kitchen space work.”
The post How to Increase Your Kitchen Pantry Space Without Breaking the Bank appeared first on Real Estate News & Insights | realtor.com®.
Wednesday, February 26, 2020
6 Dreamy Beds Under $400 We Can’t Stop Obsessing Over

Looking for a Champagne bed on a beer budget? We’ve got you covered. After scouring the reviews for this year’s top bed frames, we’ve narrowed our list of affordable favorites down to six.
Our list includes something for everyone—whether you’re looking to make a statement in the master suite or spend as little as possible while giving the guest room a refresh. The best part? These queen-size beds will complement just about any decor, and won’t break your budget.
1. Best budget bed

Wayfair
If you’re really looking to spend as little as possible while still investing in a quality bed frame, look no further than the Natural Evie platform bed from Wayfair.
With 4.7 stars and over 1,000 reviews, this simple, solid-wood frame is a steal at only $143. Some other features people love about this bed: It’s easy to assemble, and durable enough to be regularly folded up and tucked away in storage.
2. Best rustic bed

Zinus
For an additional $25, you can get a bed platform that comes with a bit more style, like this chic and modern Paul metal and wood platform bed frame from Zinus.
With a real wood headboard up top and solid metal construction below, this bed will add some instant swagger to any room. Plus, it’s another irresistible deal at just $168, which includes free shipping and a five-year warranty.
3. Best minimalist bed

CB2
This versatile black metal bed base from CB2 is exactly what it sounds like: a solid frame with a sleek look that will fit right in with your bedroom decor. Reviewers like this simple frame for its heavyweight feel and metal finish that is more scratch-resistant than its competitors’.
The bed is also compatible with CB2’s many headboards, so you can upgrade your bargain $300 bed anytime.
4. Best low frame

CB2
If your bedroom has a low ceiling, you’re probably on the hunt for a bed with a similarly low profile. For an elegant and affordable low-frame bed, look no further than CB2’s simple acacia wood bed base.
This sturdy bed comes with a warm acacia wood finish and is the perfect addition to your midcentury modern bedroom. Much like its minimalist cousin above, this $300 bed frame can also be customized with a wide variety of headboard designs.
5. Best canopy bed

Wayfair
You can still make a big statement in the bedroom without spending a fortune, and the Celeste metal canopy bed from Wayfair is proof. This highly rated canopy bed is a modern take on the Marie Antoinette–worthy beds of old.
But we don’t just love the look of this bed; we also love that its sturdy construction was designed for someone who has an equally royal wardrobe—with ample space below the frame for all sorts of shoes and clothes. Snag yours for only $327.
6. Best vintage-inspired bed

Wayfair
Looking for a bed with some vintage appeal but without an antiques price tag? That’s just one reason we love the ultra-affordable $130 Naquin platform bed from Wayfair.
Plus, we’re obsessed with the rich black metal finish and the extra storage space underneath its rustic iron pillars.
The post 6 Dreamy Beds Under $400 We Can’t Stop Obsessing Over appeared first on Real Estate News & Insights | realtor.com®.
7 Pretty Summer Porch Makeover Ideas From ‘Home Town’

HGTV
Ben and Erin Napier, stars of “Home Town,” love putting the Southern charm back into old houses. And what says Southern charm more than a pretty front porch?
On the latest episode of Season 4, “Sit a Spell,” Erin and Ben look back on their best porch renovations from previous seasons. Consider these porch makeovers the perfect inspiration to spruce up your own porch this summer.
1. A porch gives off welcoming vibes

HGTV
In Season 3, Bill and Julie need Erin and Ben’s help when they decide to move from Arizona to Mississippi. They find an amazing house right away, but it lacks a porch, making do with just a small stoop with steps out front.
Ben and Erin know right away that this house needs a porch to present a more welcoming, friendlier vibe. Plus, a porch would give Julie and Bill a great place to enjoy their new home.

HGTV
When renovations are finished, the results are amazing. Not only does the front porch make the house look more welcoming, but it also brings a more balanced look to the exterior.
2. A porch handrail can make a big difference

HGTV
Candace, also from Season 3, is a retired anesthesiologist who decides to move back to her hometown of Laurel. Of course, Ben and Erin are thrilled to help her with her house hunt, but the house she chooses needs a lot of work—especially when it comes to the front porch.

This porch now looks welcoming and fresh.
So, Erin and Ben decide to bring this porch to life with new Chippendale handrails and a fresh screen door that matches the pattern in the railings. Paired with a new coat of green paint for the home’s exterior, this porch ends up looking incredible.
3. Don’t let bushes hide your front porch

HGTV
A beautiful garden surrounding a nice porch can make afternoons sitting outside even more enjoyable. But overgrown, unruly plants can literally hide the front of a house.
When it comes to Peggy and Patrick‘s house from Season 3, Erin and Ben know that the first step in improving their porch is simply removing the huge holly bush blocking the view.

HGTV
Once the holly bush is removed, the house looks completely different. Ben and Erin add a beautiful white and green railing to the porch for style and safety, leaving Patrick and Peggy with the ideal outdoor space.
4. Install a porch swing that glides

HGTV
Bill and Jody, also from Season 3, want a beautiful porch, and Erin and Ben know exactly how to turn their overgrown, decrepit front porch into an oasis. All they need is a little bit of paint and a fabulous porch swing.

HGTV
Ben and Erin explain that the secret to the perfect porch swing is the four-point glide effect. While many swings go back and forth, this swing glides around, which, as Ben demonstrates, is perfect for napping.
5. A porch looks prettier with a roof and gable

HGTV
In Season 1, Amanda has a porch on her must-have list. Problem is, the house she chooses has only a small stoop. So Ben and Erin decide to add a porch to this charming house, and to make the porch look like a natural addition, they also add a roof and pretty gable.

HGTV
The porch with gable roof turns out to be a great addition. It adds dimension to the exterior, and it looks like it was always part of the house.
6. Fresh paint can make a porch stand out

HGTV
Season 1 couple Coy and Kenya love their new house, but they admit that the porch is a little plain. Luckily, Erin has an idea to freshen up the porch without breaking the budget. She does this with a fresh coat of paint on the floor and shutters to match.

HGTV
Erin and Ben also end up adding a beautiful white porch swing, a cozy sitting area, some curtains, and plenty of potted plants. The improvements don’t cost too much, but they make all the difference to the exterior of this house.
7. You can turn indoor space into a porch, too

HGTV
Season 2’s Anne and Russ decided to move back to their hometown. While they opted to buy a large home, they know right away that they don’t need that much space inside. So, they turned an addition into a beautiful back patio.
Ben and Erin get creative by taking down a wall and using exposed beams to create a pergola. They give the space lights above and a warm fireplace. In the end, this porch is perfect for a party or dinner outside.

HGTV
The post 7 Pretty Summer Porch Makeover Ideas From ‘Home Town’ appeared first on Real Estate News & Insights | realtor.com®.