
Credit: IStock/Ojo_Images
Shelves do more than solve your storage problems; they give you a chance to show off the copy of Infinite Jest you'll start any day now and make a room feel organized, clean, and sparkly. If you've been putting off installing some because you think you don't have the time or the skills, think again. All options here are easy breezy and can be installed in 30 minutes (or less).
More: Home Improvement Skills Every Adult Should Know
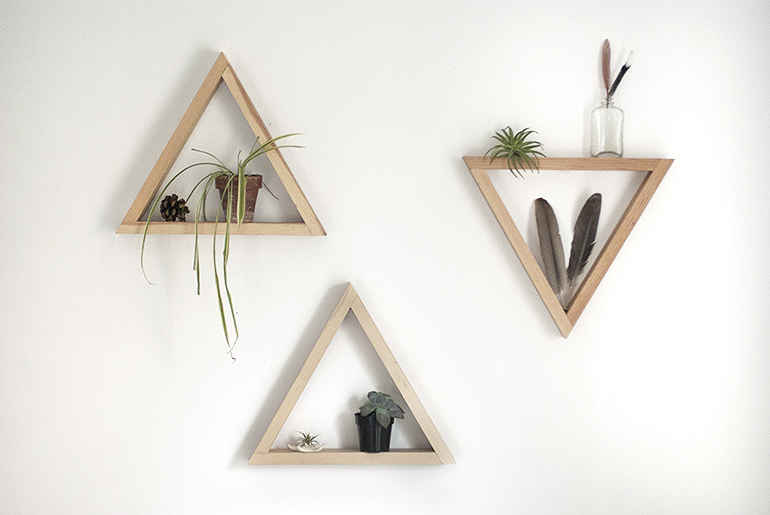
Credit: TheMerryThought
Triangle shelves
Materials needed: Wood, miter saw, sand paper, nails, wood glue
Skill level: Tim "The Toolman" Taylor
Once you've got your pieces of wood, you'll want to make a 30˚ cut at one end, flip the piece of wood 180˚, and make another 30˚ cut, making sure to keep the length consistent (the ones pictured are 12" long). Then, once all three pieces are cut, hit the ends with some wood glue, let dry for a few minutes, and nail them together. [See how it's done]
Credit: UpcycledTreasures
Industrial shelves
Materials needed: Seven steel nipples, seven steel flanges, wood, wood stain
Skill level: Mark Taylor, son of "The Toolman"
If you're going for a more industrial look, but don't want your apartment to look like a steel factory, throwing some stained wood into the mix is your best solution. For this one, make sure you're keeping the shelves level and screws anchored, or in studs. [See how it's done]
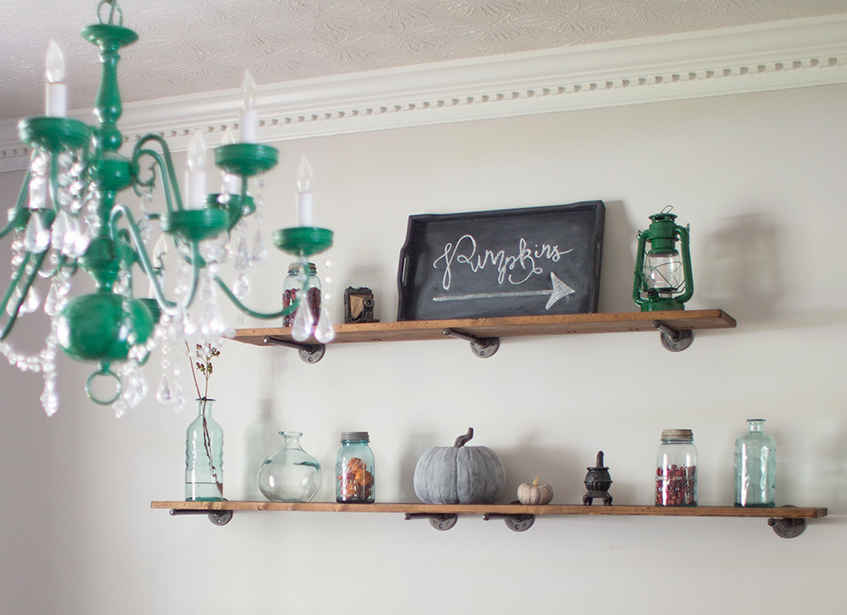
Credit: TheGatheredHome
Rustic shelves
Materials needed: Metal brackets, reclaimed wood, level, copper spray paint (optional: stud finder)
Skill level: Brooklyn lumbersexual who knows how to use a drill
These shelves are pretty straightforward. The project featured here opted to drill the brackets directly into the wall's studs, but the same outcome can be accomplished by using wall anchors. Also, you can spray paint the brackets any color, but the copper really pops next to the reclaimed wood beams. [See how it's done]
Credit: DwellBeautiful
Simple shelves
Materials needed: IKEA Ekby Valter brackets, wood, wood stain
Skill level: Crafty mom
If you happen to find yourself in the meatball-scented land of incertitude known as IKEA, but don't want to commit to the ubiquitous shelving set-ups that everyone has, opt for the Ekby Valter brackets instead, and then find and stain some wood yourself! [See how it's done]
Credit: Burkatron
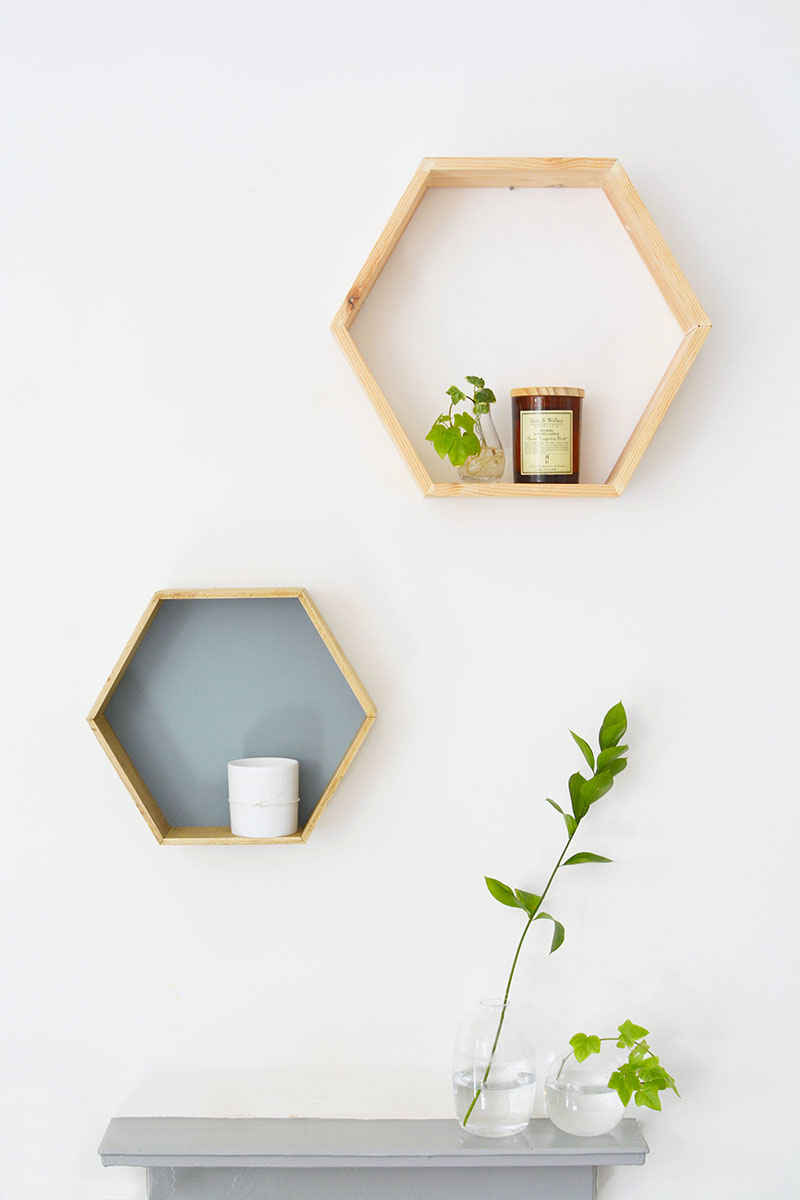
Hexagon shelves
Materials needed: Wood, mitre saw, hammer & nails
Skill level: Al Borland
Like the triangle shelf, you'll want to take six pieces of equally measured-out wood and cut 30˚ angles into the ends of them. Once you have your six pieces, secure them in place with wood glue. Let that dry, and then yell out "It's hammer time!" as you nail all the pieces together. [See how it's done]
To learn how you can make 5 more awesome shelves totally on your own, get the full story at Thrillist.com!
More from Thrillist:
9 Simple Lighting Tips to Brighten Up Your Apartment
How to Make a Custom Bar Cart in an Hour, For Less Than a Bar Tab
Like Thrillist on Facebook: www.facebook.com/Thrillist
-- This feed and its contents are the property of The Huffington Post, and use is subject to our terms. It may be used for personal consumption, but may not be distributed on a website.


No comments:
Post a Comment