Friday, December 4, 2020

The Walk-In Kitchen Pantry Is the New Designer Shoe Closet

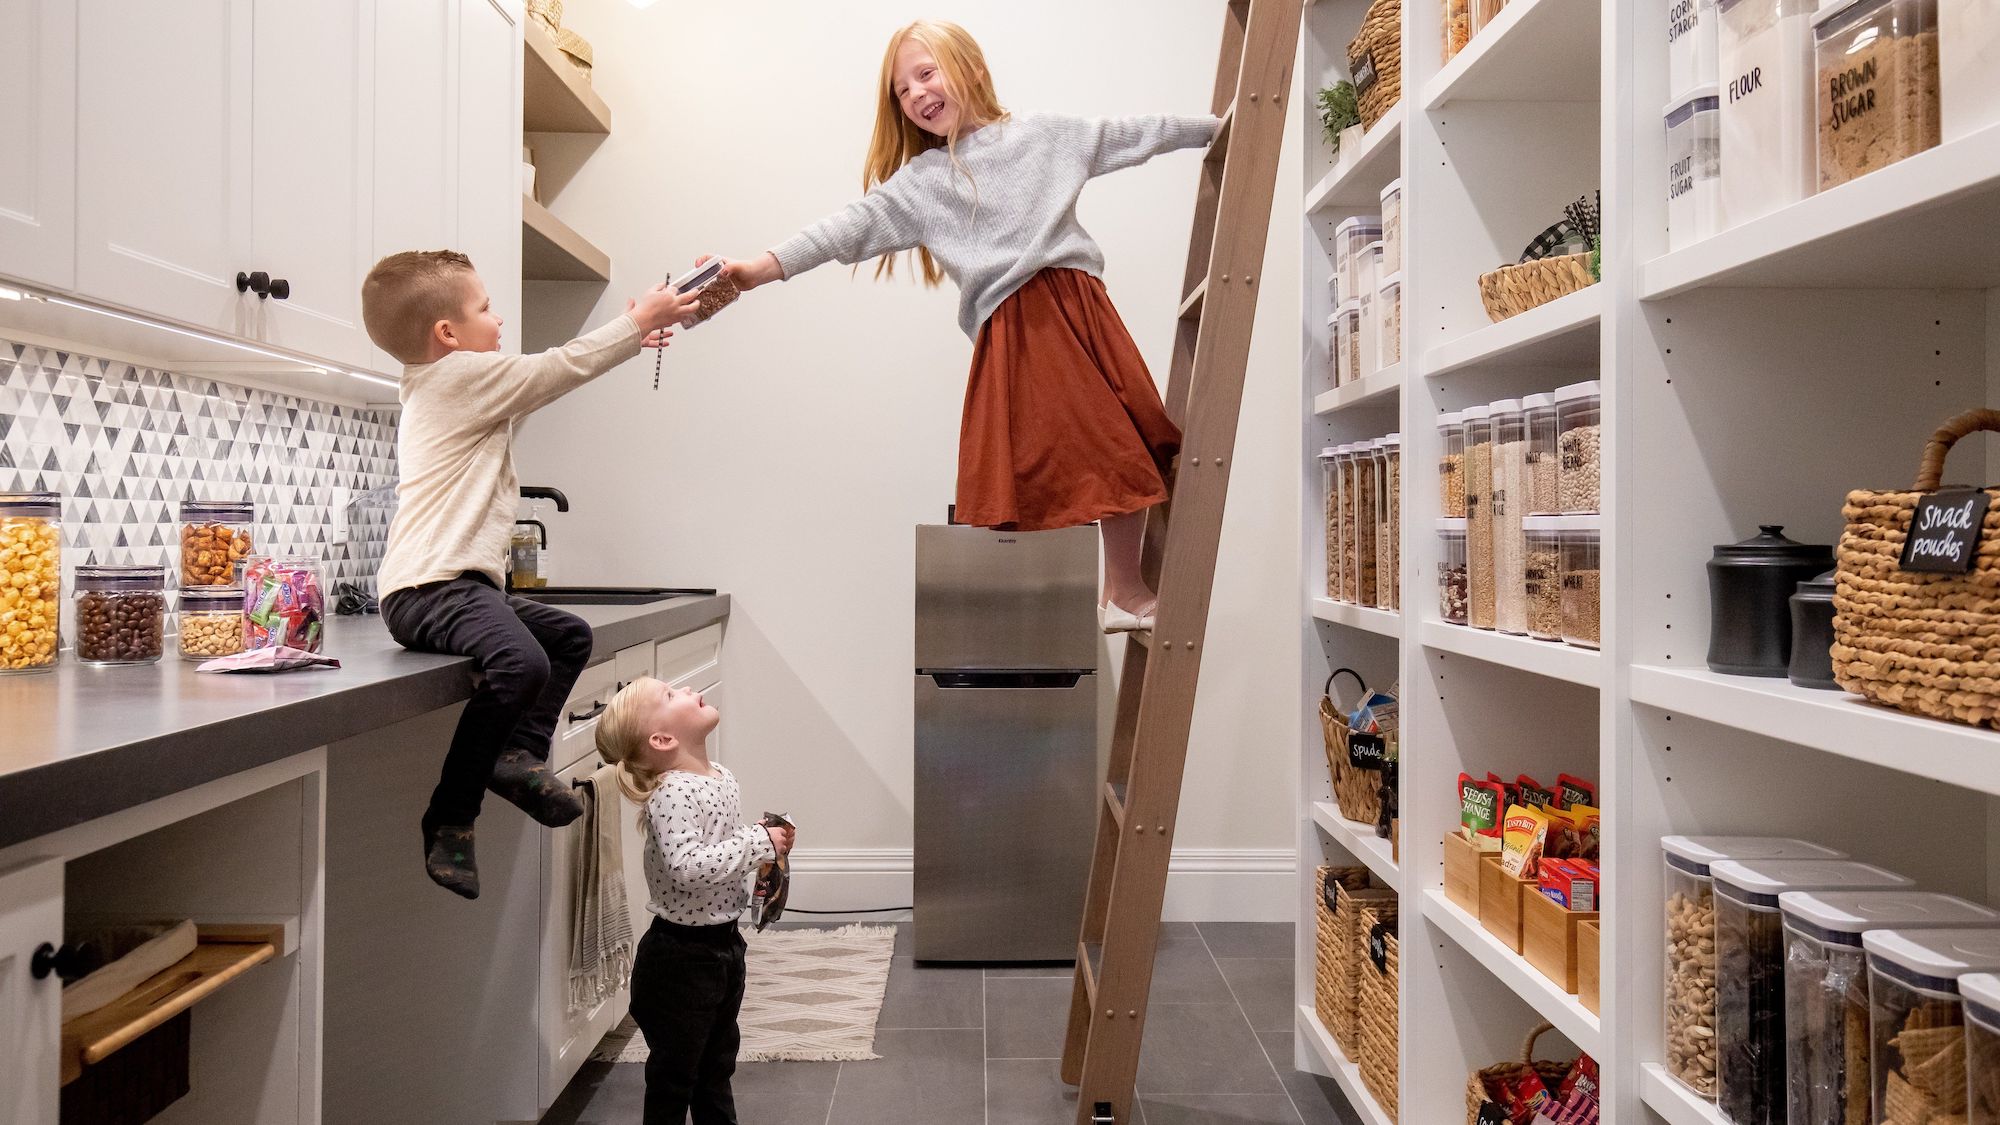
Kids in kitchen pantry

Lindsay Salazar for The Wall Street Journal

When Tara Jenson began planning a $1.5 million home in Gilbert, Ariz., with her husband, Kendall Jenson, there was one dream amenity she wouldn’t compromise on: a walk-in pantry. And not just any pantry, but one with multilevel shelves arrayed with custom-labeled clear canisters for snacks and airtight bins of decanted Froot Loops and bran flakes. A pantry, in other words, that would make Costco bulk goods look as glamorous as a row of Christian Louboutins in a designer shoe closet.

“My husband wanted to do straight rows of shelving, all the same height, all the way across. I was crying. I said, ‘I can’t do it, that’s not what I envisioned,’ ” recalled Ms. Jenson, 37, who shares four children and one stepdaughter with Mr. Jenson, 48, a dermatology physician assistant. “If you have straight shelving all the way across, how do you organize it?”

Before the family moved into the 6,000-square-foot home last year, Ms. Jenson spent an extra $900 for custom pantry shelving that was inspired by the Instagram posts of the reality-television star Khloé Kardashian. Then she hired Shalae Price, a professional organizer, to create a Dewey Decimal-style system within the 8-by-11-foot pantry, sectioning the dry goods into zones and displaying them in a battalion of whitewashed rattan bins, clear canisters and turntable caddies. The total cost was about $5,000.

“People say, ‘Oh my gosh, Tara, your pantry!’ ” said Ms. Jenson, who elicited gasps from her friends when she went in to grab a Snickers bar during a group FaceTime call. “They all ended up saying, ‘Send me pictures.’ ”

The home pantry is in the spotlight. As the coronavirus pandemic surges and more school-age children and working adults are stuck at home, food-hoarding has become something of a national pastime. Pictures of aspirational larders with cork-topped calligraphy spice bottles and apothecary jars of dog treats are rampant on Instagram, with hashtags like #pantryinspo and #pantrygoals.

“Get Organized with the Home Edit,” a home-organizing reality show that made its debut on Netflix in September, featured a celebrity pantry makeover for singer-songwriter Kane Brown. (Spoiler alert: He has a s’mores shelf.)

Ms. Jenson said her pantry has been a lifeline during the pandemic. There are phalanxes of boxed mac and cheese and ramen noodles—and more concealed in backstock bins behind them. Containers of emergency food pouches line the top shelves. “I did a big grocery run at the beginning of corona, and apart from milk and eggs, I did not do another for four or five months,” Ms. Jenson said. “We probably could live off this pantry for a year.”

The Jenson family at their Gilbert, Ariz., home.

Matt Martian for The Wall Street Journal

Tara Jenson hired a professional organizer to create her pantry.

Matt Martian for The Wall Street Journal

The earliest pantries were closets or cupboards where bread was stored. The word pantry comes from “paneterie,” a Medieval French derivation of the Latin word for bread. Elaborately carved and spindled panetières—cabinets for bread—were status symbols in 18th- and 19th-century France.

Today, a walk-in pantry has become the most desirable kitchen feature for home buyers, according to a survey published by the National Association of Home Builders in 2019. A report by the NAHB’s economics and housing policy group last year found that more than 85% of new large homes (more than 3,500 square feet) featured walk-in pantries.

“We’ve been offering pantries for a number of years, but the luxury pantry is the new must-have. For some of our buyers it serves as a Pinterest or Instagram-ready organizational space,” said Lisa McClelland, national vice president of design studios for Toll Brothers, the upscale-home builders.

Toll Brothers homes at their Edelweiss community in Draper, Utah, feature a 70-square-foot walk-in pantry that can be expanded to include a prep kitchen with appliances.

Toll Brothers

Toll Brothers recently unveiled its new Porter home model—priced between $635,000 and $779,000—which features a 70-square-foot walk-in pantry with options for built-in shelves, quartzite countertops and hardwood floors. Buyers can further accessorize the pantry with spice-rack pullouts, wine-storage columns and built-in lazy Susans for extra storage in tight corners.

Amita and Mark Riksen, who both work in the energy sector, relocated from Orange County, Calif., to a $1 million Toll Brothers home in Spring, Texas, outside of Houston, in May as coronavirus infection rates began to soar. Ms. Riksen, whose two college-age children are at home studying remotely, is glad that she opted to extend the 7-foot-2 by 5-foot-2 walk-in pantry by several feet to include space under a stairway.

“We wanted to make it as big as possible. I’m not a person who overstocks, but I like to see what we have so we can plan. It’s like going into your own little grocery store,” Ms. Riksen said. “Also, the kids are not standing in front of the fridge with the door open. They’ve got their snacks in the pantry so they hang out there.”

Some homeowners view an expansive pantry as a home essential, not a frill. Members of the Church of Jesus Christ of Latter-day Saints are encouraged to keep a minimum three-month food supply in their homes, with longer-term food storage as a goal.

Payton Jones, a granddaughter of Brent Hatch, walking through a concealed door from their pantry to the kitchen.

Lindsay Salazar for The Wall Street Journal

“Here in Utah, there are big families, big homes and lots of food storage—people love a beautiful pantry,” said Tracy Bowers, a home organizer based in Salt Lake City, adding that many homeowners have additional cold storage space in cement-walled basements. “You don’t want your pantry overstuffed. If there’s overflow we bring it down to cold storage,” she said.

Ms. Bowers, who works with a team of 10, creates different pantry zones for items like breakfast foods and baking supplies, tossing out all the boxes and packaging as she goes. “That creates tons of space. We put things in acrylic or glass containers so you see what you have,” she said. “Instead of an ugly package of fruit snacks, you have a beautiful basket.”

Ms. Bowers stocked and organized a 128-square-foot pantry for Brent Hatch, a semiretired energy executive and venture capitalist who lives south of Provo, Utah. The pantry is an attention-getter in the 13,000-square-foot home that Mr. Hatch, 70, built with his late wife, Darlene, an ardent baker and cook who died before it was completed in July.

Bev and Brent Hatch in the kitchen of their Utah home with grandchildren Lennon, Jaxon and Everly Hatch.

Lindsay Salazar for The Wall Street Journal

The 8-by-16-foot pantry is equipped with a deep freezer, a pebble-ice machine, an instant hot-water tap for coffee and hot cocoa, cabinets that extend to an 11-foot ceiling and a library ladder on rails to reach them. A small door opens to the garage so that groceries can be passed straight into the pantry. Mr. Hatch said it cost about $35,000 to create and professionally organize the space.

“There’s a fair amount of cold cereals and instant hash browns, and big jars of candies and pretzels for the grandkids,” said Mr. Hatch, a member of the Church of Jesus Christ of Latter-day Saints who has 22 grandchildren, all of whom like to visit. “We have a nice sliding barn door and you can hear that in use quite often. They sneak in and grab their wares. And they love the ladder.”

Mr. Hatch also has a well-stocked cold-storage room on the home’s lower level. He said the pantry was meant for daily use and as a fun place for his family.

In October, the pantry got a workout when Mr. Hatch married his new wife, Bev, 69, hosting a reception for more than 50 guests in the home. “There’s lots of counter space for preparing meals, and it’s handy having that sink and a big ice machine right there,” he said.

Heather Boger designed a 6-by-8-foot pantry for her new home in Truckee, Calif., near Lake Tahoe, where she moved last December with her husband, Tom Boger, 53, a marketing executive, and two teenage sons. “I was super excited. I never had a pantry before. It was really going to be a gift to myself,” said Ms. Boger, 47.

The pantry is concealed from the kitchen by a door panel clad in the same Neolith stone used on the countertops in both rooms. Floating shelves are lined with large glass jars of pasta, beans and other staples, while bulky appliances are tucked out of view in closed cabinets beneath the countertops. A band of low windows run along two sides of the pantry, making it bright and airy. LED strip lights under the shelves add a touch of drama at night.

Ms. Boger, who likes to mix cocktails in the pantry, installed an ice-maker; there is also a Vitamix blender and a Breville convection oven. “It’s where we do our smoothies each day, and it’s where the boys bake their cookies,” said Ms. Boger, who estimated the cost of the pantry, including setup, at just under $15,000.

Ms. Boger’s home organizers, Brandie Larsen and Ryan Eiesland, prepared a vision board with options for storage bins, clip labels and canisters in a range of textures, materials and colors. Each of her sons has his own woven sea-grass basket of snacks. Treats for Gumbo, the family dog, are stored in an Anchor Hocking glass jar with an oak lid.

“Everything is right there and accessible. I can go, ‘Oh, we’re out of granola,’ or ‘Gumbo needs new dental sticks,’ ” Ms. Boger said. “It’s a frivolous luxury, but I’m super appreciative of it. Unloading groceries in that pantry is fun.”

The post The Walk-In Kitchen Pantry Is the New Designer Shoe Closet appeared first on Real Estate News & Insights | realtor.com®.


Thursday, December 3, 2020

Don’t Let Christmas Go Up in Flames! 7 Home Fire Safety Tips

MediaProduction/Getty Images

Christmas trees popped up in homes in record time across the country this year, far ahead of the holiday season. People are turning to festive decorations to counter the doom and gloom of 2020, and spread some measure of cheer to others. But some elements of seasonal decor are potentially hazardous.

The combination of evergreen trees, wreaths, or branches with candles or lighting raises the risk of a home fire—and burning down your home is not the way you want to close out 2020.

“To make sure the holidays are the happiest time of the year, especially in these extraordinarily challenging times, you have to take fire safety precautions very seriously,” says Jami Warner, executive director of the American Christmas Tree Association. “You can deck the halls with beautiful Christmas trees and holiday decorations while keeping the safety of your loved ones top of mind.”

And Christmas tree safety is no joke. According to ACTA, Christmas trees alone result in $13 million in property damage annually. Tree dryness, electrical malfunction with lights, and poorly located heating sources make a deadly combination for a fire.

Stay fire-smart this year by taking the following measures to ensure a holiday season that stays jolly.

1. Use light strands in good condition

The more lights the merrier, right? Only if those lights are in good shape before hanging and do not have frayed or loose connections.

“No matter the climate where you live, look for the UL seal. That seal means that the lights meet the national industry standards of the American National Standards Institute,” says Warner.

Make sure to use lights only where they’re supposed to be used; outdoor lights should be used outdoors and indoor lights should be used indoors. Also, make sure to unplug your lights before going to bed.

Warner says to never put lights “anywhere near a heat source like a fireplace, a space heater, an oven or stove, or candles.”

Modern LED lights are the safest to use, and most high-quality artificial trees come with LED lights installed.

2. Give some TLC to your fresh Christmas tree

A fresh evergreen is a beautiful tradition but it requires maintenance so that it doesn’t become a fire hazard. Experts say using a fresh tree—one with vibrant green needles that don’t break or shed easily—makes it less likely to catch fire.

“Water real trees every day,” says Teresa Neal, fire program specialist at the U.S. Fire Administration. “Keep real trees away from heating vents.”

Trees should stay away from radiators, fireplaces, lights, and candles, too.

Warner suggests that real trees be taken down after four weeks.

3. Ensure your artificial tree is fire-resistant

Artificial trees require less maintenance than their living cousins, so you won’t have to water them or sweep up the needles. But make sure you buy one that’s fire-resistant.

“Look for the ‘flame-resistant’ label on artificial trees,” says Neal.

4. Anchor your tree

The last thing you want is to yell “Timber!” as you watch your Christmas tree take a fall. Experts recommend anchoring your tree to the ceiling or walls to ensure it stays upright. A good idea is to put it in the corner to make it easier to anchor from two sides.

Also, watch children and pets in the vicinity to prevent them from knocking over the tree.

5. Mind your candles

The top three days of the year for home fires caused by candles are Christmas, New Year’s Day, and New Year’s Eve, according to the U.S. Fire Administration. And while candles can make any space festive, they can also light a fire.

“Avoid using candles when possible, and consider using battery-powered ones instead,” says Neal. “If using candles, always place them on a sturdy base that doesn’t burn, away from anything that can burn. And never leave candles unattended, especially around children and pets. Do not use candles on bedside tables or near greenery, including a Christmas tree.”

6. Mind your heat sources

Nearly half of holiday decoration fires happen because decorations are placed too close to a heat source. No matter what kind of Christmas tree you display, keep it away from any and all heat sources.

Also, holiday candles should be placed at least a foot away from anything that could catch fire.

7. Have working smoke alarms

Properly maintaining a smoke alarm is important all year long, but it’s especially essential during the cooler months when fireplaces are going and Christmas trees are decked out.

“Make sure you have working smoke alarms on every level of your home. Have them inside and outside sleeping areas. Test your alarm each month to make sure it is working. If your alarms are 10 years old or older, replace them,” says Neal.

The post Don’t Let Christmas Go Up in Flames! 7 Home Fire Safety Tips appeared first on Real Estate News & Insights | realtor.com®.

The Property Brothers Reveal One Tiny Upgrade That’s a ‘Big Deal’

Property Brothers

HGTV

Drew and Jonathan Scott know that even the best laid plans can change. And the latest “Property Brothers: Forever Home” proves that a renovation is often required to keep up with the times!

In the “Honoring Lola” episode, Drew and Jonathan work with Charisma and Eric, parents of three who moved from Chicago to Las Vegas three years ago to live with Charisma’s mom, Lola. Sadly, Lola passed away right as they were moving in, and Charisma and Eric suddenly found themselves in a new city and in a big house that didn’t feel like home.

Now, it’s up to Drew and Jonathan to update the home to make it more appealing and functional for a family with three busy kids—all on a budget of $125,000. Here’s how the Scott brothers fix up this dated house, which might inspire some makeovers around your own abode.

Flooring is one of your ‘biggest investments’

floors
The Scott brothers examine the old floors.

HGTV

Charisma and Eric bought this house, in part, because Lola liked it so much, but it doesn’t quite fit their tastes.

For example, Charisma hates the tile floor because she says that it never looks clean. She wants something that will look good even if it’s a little dirty, and will last a long time.

So the brothers install plank-style porcelain, which has the durability of tile but looks like wood. The only problem: They’re not sure how to install the tile. While they’d usually line the flooring up with the front door, this entryway is positioned differently from the rest of the house. So if the tile runs in line with the door, it won’t align with any other walls.

flooring
This flooring looks like wood, but it’s much more durable.

HGTV

“Flooring install is no joke,” Jonathan says. “This is one of the biggest investments in any home, so getting one you love and installing it correctly, it’s a big deal.”

The brothers decide to align the flooring with the living room wall, which means it will line up with most of the walls in the house. This flooring may not be laid in the traditional way, but it looks amazing throughout the house.

Bring the eye up with the right light fixtures

living room
This high ceiling deserves some attention.

HGTV

When Drew and Jonathan first walk into Charisma and Eric’s house, they’re impressed by the beautiful high ceiling in the entryway and living room. In fact, Eric says that this grand ceiling is one of the things they like most about the house.

The Scott brothers decide to highlight the high ceiling by adding a beautiful chandelier in the living room. The black lighting fixture draws the eye up, showing off the high ceiling (now painted a bright white) while also complementing the gray decor.

When the renovation is finished, Eric notices the new light.

“I love the chandelier, too,” he says. “There was nothing here before, so it just helps bring attention to how high the ceilings are here.”

Create the perfect mantel by aging wood

fireplace
Charisma and Eric joked that this fireplace had so many stones, the kids could climb it.

HGTV

Eric and Charisma want their family room to be warm and inviting, but with a stone fireplace, the space just looks dated. The brothers decide to update the space by giving the fireplace a clean new look, installing elegant tile and built-in shelving.

Still, the best part of this fireplace has to be the wood mantel, which looks rustic and old—but is actually brand-new!

fireplace
This torched mantel brings depth to the living room.

HGTV

“This solid piece of wood is going to look awesome,” Jonathan says of the new mantel. “But to make it special, I decided to torch it to really give it that aged feel.”

Jonathan torches and sands the wood until it looks like a 100-year-old piece of reclaimed wood, which would ordinarily come with a big price tag.

Coordinated colors help with flow

door
Jonathan Scott wanted to stain this door to match the mantel.

HGTV

With a beautiful fireplace mantel installed in the living room, Jonathan now wants to stain the kitchen pantry door a matching dark shade. However, the dark stain doesn’t seem to work in the otherwise gray kitchen.

“Hey, what can I say?” Jonathan says. “I tried something a little different with this door, and it didn’t work.”

kitchenThis kitchen has a lot of gray tones.

While he wanted the door to stand out as a statement piece in the kitchen, he decides that the dark stain may be too bold. He paints it dark gray to match the vent hood, and it ends up looking great.

Match your backsplash to the counter slab

backsplash
Charisma and Eric couldn’t decide on one backsplash, so they installed two.

HGTV

When Charisma and Eric moved in three years ago, they tried to pick a kitchen backsplash—but couldn’t decide on one. So they compromised and put up two different designs (both his and her choices). By now, both look dated.

Drew and Jonathan want to take out these two tile patterns and replace them with one beautiful backsplash both Eric and Charisma will love.

backsplash
This backsplash extends up from the slab countertop.

HGTV

The brothers choose quartz countertops and decide to run that same material up the wall as a backsplash. The brothers know that this look will stay in style for a while, and the quartz will be easy to clean.

“It’s a modern look using a timeless material. That’s about as low maintenance as a backsplash can get,” Jonathan says.

By the end of the brothers’ latest renovation, this family has a great place to remember Lola as well as a fun place to make new memories.

The post The Property Brothers Reveal One Tiny Upgrade That’s a ‘Big Deal’ appeared first on Real Estate News & Insights | realtor.com®.

How to Organize an Instagram-Worthy Kitchen Pantry

c

Lindsay Salazar for The Wall Street Journal

So you want your pantry to be an Instagram sensation? Professional home organizers offer tips for turning a visit to your walk-in pantry into a feel-good experience rather than a scavenger hunt for that can of tomato soup.

Clean it out: “We need a blank canvas to start with, so the first thing we always do is take everything out,” said Shalae Price of AZ House of Order in Mesa, Ariz. Toss the expired instant mashed potatoes and stale spices.

Shelve it: An ideal pantry shelf is 15 inches deep, according to Tracy Bowers of Organize Simply in Salt Lake City, Utah. “It’s the perfect depth for the baskets and containers we often use in the pantry,” she said. “You don’t want shelves that are too deep, where things get lost in the back.” And because needs change over time, having adjustable shelves is a must, she added.

Categorize: Create zones within your pantry, such as “baking,” after-school snacks” or “breakfast.” The breakfast station, for example, could feature pancake mix, oatmeal packets and maple syrup grouped in a clear bin or bamboo basket. “If you think about why people become disorganized, it’s because they don’t know where to put things back,” said Ms. Price. “Even little kids know, ‘When I put this box of cereal back, it goes in the breakfast station.’ ”

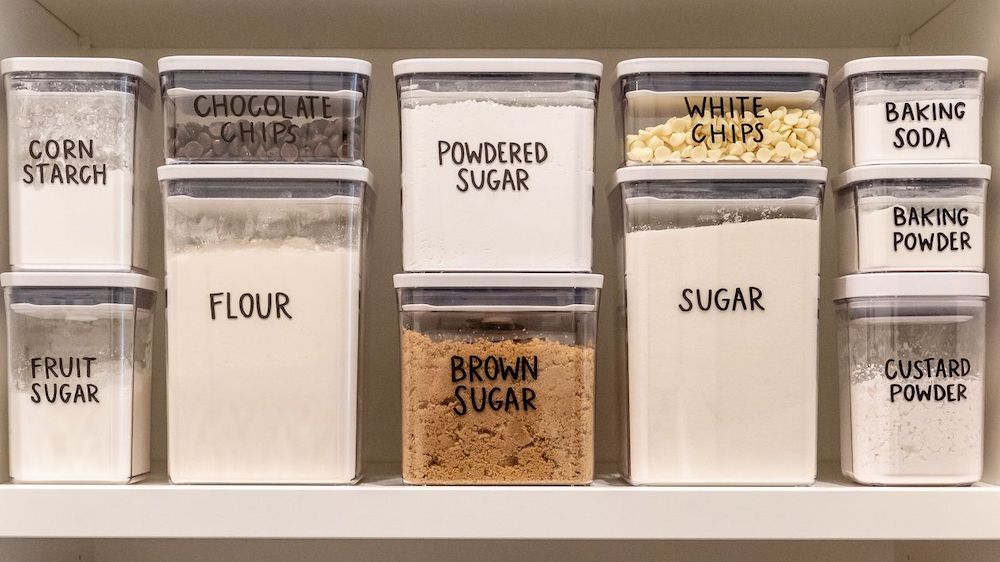
Ditch the packaging: Save space by loading your pasta and Goldfish crackers into airtight containers and throwing away the boxes. Clear canisters are aesthetically pleasing and also let you see at a glance when you need to restock. Glass apothecary jars give a pantry a boutique look; flip-top acrylic is more family friendly. “If you need things that your kids can reach, we’re probably not going to use a lot of fragile glass jars,” said Brandie Larsen of Home Sort, in Sacramento, Calif.

Pantry shelves
Proper shelving is key.

Lindsay Salazar for The Wall Street Journal

Spin it, stack it: Lazy susans, or turntables, create storage space in tight spots and come in many sizes. “We use turntables to access shelves that are up high and in corners, so a corner isn’t a dead space,” Ms. Price said. Another pantry hack: Three-tiered, expandable shelf units create stadium seating for your cans.

Bin tags and labels: Use a desktop cutting machine to create custom vinyl labels for your canisters, baskets and bins. “They are pretty and they tell you exactly where to find everything and where to put everything back,” said Ms. Price. Ms. Bowers is partial to handwritten bin tags—black metal inscribed with a white pen for a modernist pantry, or chalkboard labels for countrified larders.

Don’t overstuff: Leave space around all of your bins and containers so that they are easy to grab. “If you love the look of this pantry and you don’t know why, it’s because it’s not stuffed to the brim,” Ms. Larsen said.

The post How to Organize an Instagram-Worthy Kitchen Pantry appeared first on Real Estate News & Insights | realtor.com®.

Wednesday, December 2, 2020

Sick of Modern Farmhouse? ‘Fixer to Fabulous’ Reveals What’s Hot Now

fixer to fabulous

HGTV

Modern farmhouse design has been popular for years, but if you’re tired of barn doors and shiplap, the latest episode of “Fixer to Fabulous” shows off a cooler alternative: modern industrial.

In “Old Dojo to Modern Mojo,” Jenny and Dave Marrs help Jennifer and Philip Cristofaros reimagine an old karate studio in Arkansas. They’re given a big budget of $215,000 to fix up this home, but they’ll need every penny because this space needs a ton of work.

Read on to find out how Dave and Jenny create the quintessential modern industrial home, which might inspire some upgrades around your own abode, too.

Cement siding, painted black, creates a modern exterior

house
This house was previously used as a karate studio.

HGTV

Jenny and Dave know that Jennifer and Philip love modern industrial style, so they start their renovation by giving the exterior a sleek upgrade.

They cover this former karate studio with cement siding to give it a clean, modern look.

“It’s really simple, has clean lines, and it’s going to look really sleek and modern,” Jenny says of the paneling.

house
Concrete panels make this house look modern.

HGTV

Then to finish the exterior, Dave and Jenny paint the siding black to make it look extra contemporary.

While black concrete siding on a house may sound dark and uninviting, when paired with a mature tree in the front yard and plenty of new greenery, this house looks both modern and comfortable.

Polish concrete floors for an industrial look

living room
Jennifer and Philip Cristofaros love the look of the concrete underneath the carpeting they had removed.

HGTV

Jennifer and Philip love the industrial modern style, so when they pull up the carpet in their new home and find concrete, they decide to keep the look.

Jenny and Dave think this is a great idea, and they offer to bring in a team to make the concrete look even better.

“They take a diamond stone and come in here and grind the concrete,” Dave says, examining the floor.

living room
These concrete floors go with the industrial style.

HGTV

When the polishing is done, the floors look shiny and sleek. This living room still has that industrial look, but now, with a glossy sheen, these concrete floors look finished.

Brick veneer can add texture—and look as good as the real thing

kitchen
This old karate studio presented a blank canvas.

HGTV

While Jenny and Dave decide to use a lot of concrete in this industrial renovation, they realize that they’ll need to mix it up with some other materials so that the home doesn’t end up looking cold and flat.

Philip and Jennifer mentioned that they used to live in New York City, so Jenny is inspired to bring a little bit of city style to this house.

kitchen
This brick wall gives the kitchen a modern industrial look.

HGTV

Dave adds a layer of brick to the kitchen wall, giving the space an urban feel. When it’s finished, the brick veneer looks surprisingly authentic.

“It just feels like you uncovered a wall in an old building like in Manhattan,” Jenny says of the finished product.

The brick provides texture and color to the industrial home and adds a warm, rustic quality to a space that otherwise might feel too modern.

A bit of color can keep an industrial space from looking cold

living room
This mural is a great contrast to the modern style.

HGTV

While the brick wall adds color and texture to the kitchen, Jenny and Dave know it’s not enough to offset all of the industrial modern features in this living space.

So they commission a bright and bold mural to be painted on one of the walls. The floral statement piece is a stark contrast to the muted colors and clean lines in the rest of the house, which makes the home feel dynamic.

“It is the perfect contrast,” Jenny says.

Painted concrete looks just like modern tile

patio
Jenny Marrs painted this concrete patio, and it looks just like tile.

HGTV

Dave and Jenny know that it’s going to take a lot of cash to turn this old dojo into a dream home, so they’re careful to save money wherever they can.

Jenny comes up with an idea to save money on the new patio by painting the concrete slab, rather than buying tile. She uses a stencil to paint a geometric design directly on the concrete.

“I do think it is going to define the space and set it apart from just a normal concrete slab patio,” Jenny says.

After the work is done overall, it’s hard to believe this house was once a run-down karate studio. It looks like Jenny and Dave have earned their black belt in modern industrial design!

The post Sick of Modern Farmhouse? ‘Fixer to Fabulous’ Reveals What’s Hot Now appeared first on Real Estate News & Insights | realtor.com®.

Tuesday, December 1, 2020

5 Ways You’re Killing Your Houseplants—and How To Stop

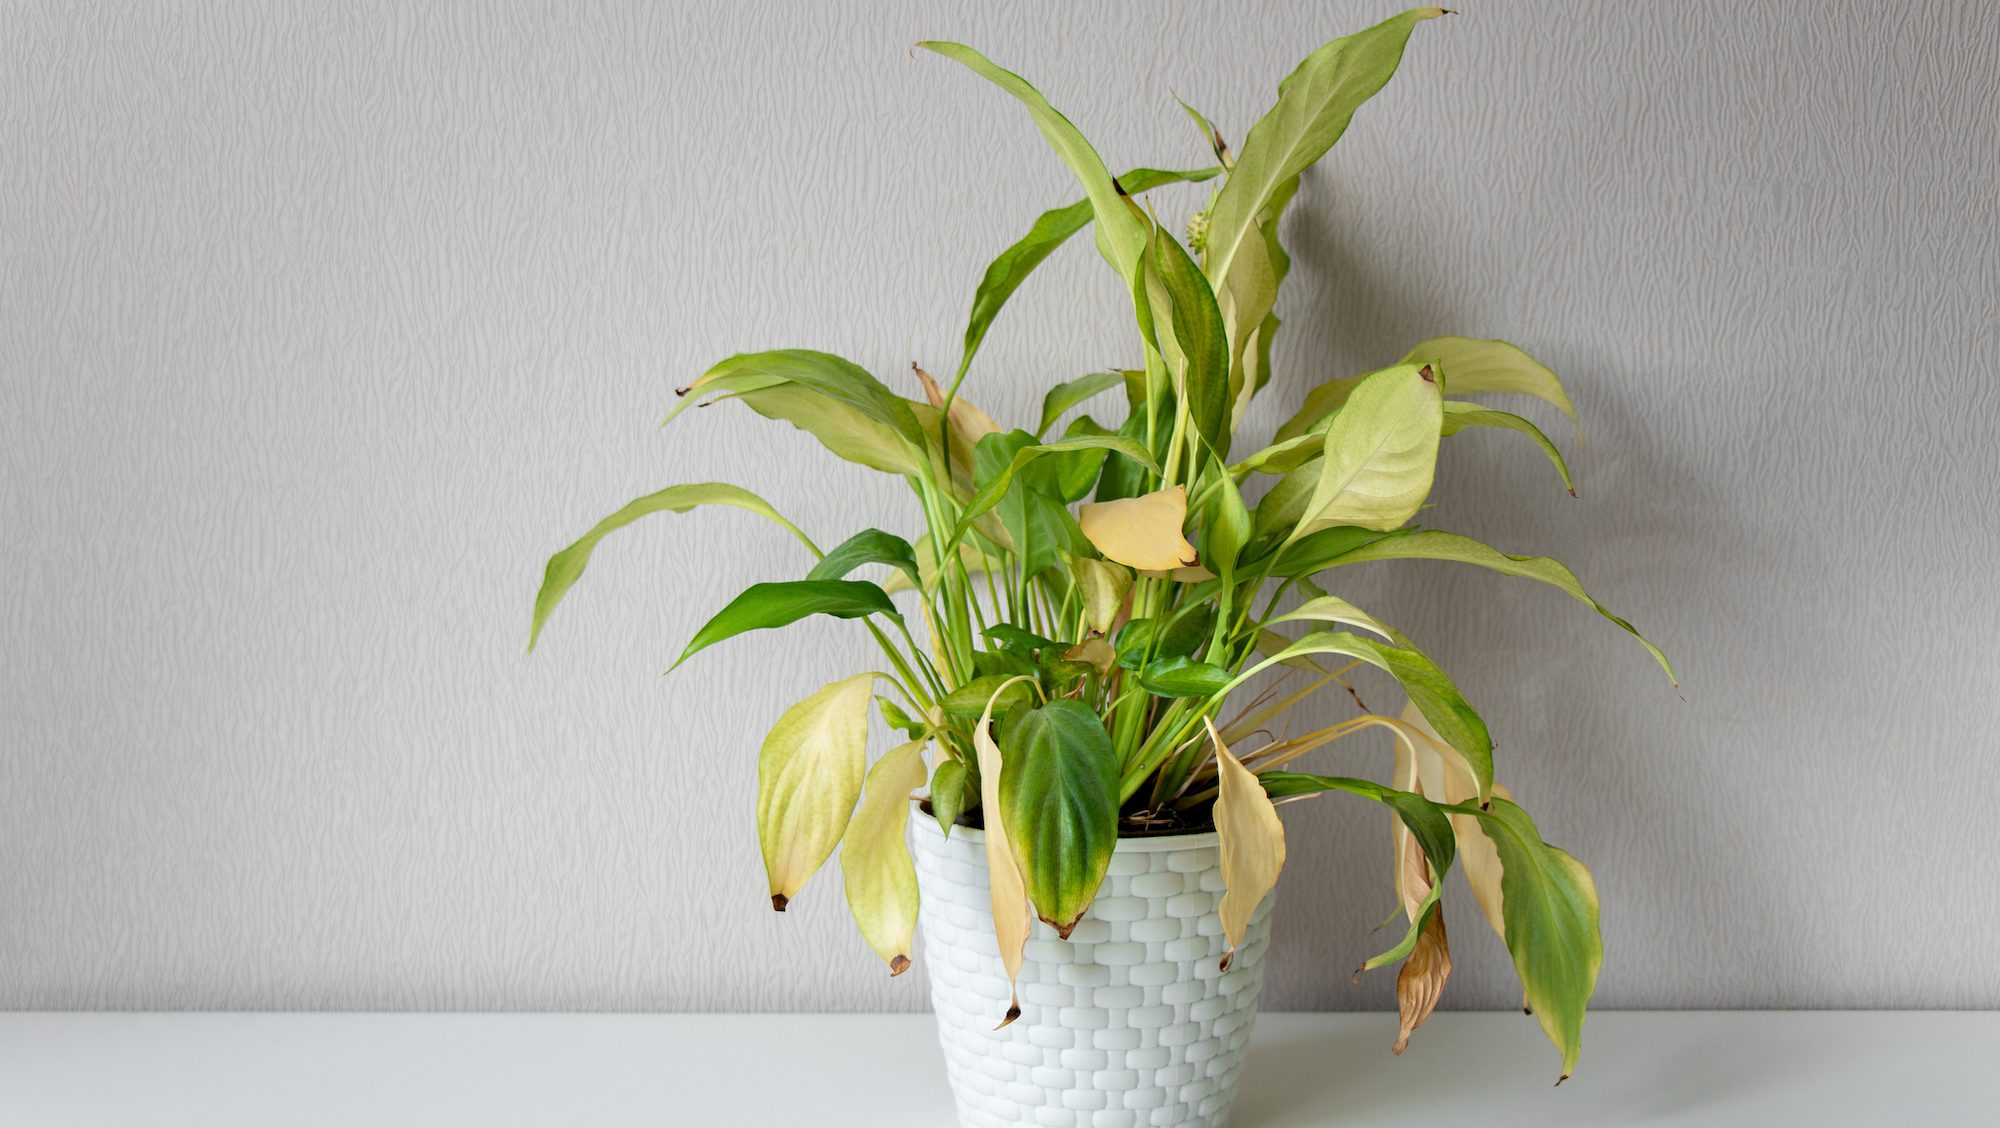
dying houseplant

Yelena Khayrullina/Getty Images

Houseplants often are a designer’s secret weapon—pops of greenery can instantly elevate anybody’s home decor, no matter the style. But while a thriving plant can complete the look of any room, a dying one quickly becomes a depressing focal point.

What’s worse: Once you realize you have an unhappy houseplant, it can be surprisingly difficult to diagnose what’s wrong. Are you giving it too much water, or not enough? Does it need more light, or less?

Rather than letting you waste one more minute guessing what’s wrong, we’ve gathered up five of the most common ways people kill their houseplants—and how you can identify (and fix) the problem before it’s too late.

1. Underwatering

One of the most common downfalls of houseplants is underwatering. Whether you forgot to water it one week or just didn’t realize how much water your plant truly needs—underwatering happens.

Horticulturalist Andrew Gaumond, of Petal Republic, explains what underwatering looks like and how to fix it.

“The most probable cause of droopy leaves is lack of moisture in the soil base,” says Gaumond. “A moisture meter or probe—maybe even your fingers—are your best friends here to determine the moisture content around the base of the planter. If it’s bone-dry, it’s clear your plant is in need of a good drink.”

Another sign of underwatering is yellowing leaves.

“Yellowing leaves that feel a little crisp to the touch and are also potentially curling is another telltale sign your plant is underwatered,” Gaumond says.

If your plants look anything like this, check the soil to see how dry it is. If it feels dry, give your plants a good, long drink. Assuming you have drainage holes on your pot, try watering the plant until water runs out the bottom, then continue to monitor the soil to see how quickly it dries out again.

2. Overwatering

An overwatered plant can be hard to diagnose, since it looks a lot like an underwatered plant. But diagnose it you must—and fast, since overwatering is one of the easiest ways to kill your plants quickly.

“The most serious sign of an unhappy houseplant would be blackening or wilting leaves, which are often caused by chronic overwatering,” says Zachary Smith, arborist and president of Smith’s Pest Management.

“This is a common problem with houseplants, where the plant has too much water and the leaves are wilting or drooping because the roots are suffocating in standing water,” Smith explains.

If you’re facing droopy, blackened leaves right now, check the soil to see how wet it is. Be sure the plant has proper drainage (that is, a way to get rid of excess water) and let it dry out completely—for at least a week—before giving it any more water.

3. Inadequate light

If watering isn’t the issue, then the next likely cause for an unhappy houseplant is insufficient sunlight.

“Brown or yellow leaves may be a sign of insufficient light or nutrient deficiency,” says Smith.

One way to determine whether or not your houseplant is suffering from inadequate sunlight: Simply read up on it.

If you know the name of your plant, you can easily look up how many hours of sunlight it needs, and what kind (direct or indirect).

If you don’t know the name of your plant, check out this forum on Reddit. By posting a photo of your plant, others will help you identify what it is so you can research what it needs and place it in a brighter spot in your home.

But be forewarned: “It’s very hard to correct insufficient light issues, as most houseplants need more light than most houses can provide, with many houseplants on a slow decline from the day they’re purchased because of light levels.” Smith cautions.

If that’s the case, it might be time to bid adieu to your light-loving houseplant and opt for one that thrives in dimmer conditions.

4. Too much light

On the other hand, it may be that your houseplant is unhappy as a result of too much light. Here’s what that looks like.

“A plant receiving too much light might draw its leaves down around the pot as it tries to get away from the light,” says Lisa Eldred Steinkopf of The Houseplant Guru. “It also may be discolored and appear bleached out. Plants can actually be sunburned, just like us, and it shows up as dead patches of brown tissue on the leaves.”

If you see any of these symptoms, it might be time to relocate your plant to a different spot in the house. Again, spend some time reading up on your plant and be sure to note what kind of light it needs. For example, lots of indirect light is not the same as a few hours of direct sunlight. Get to know your plant’s needs, and make adjustments from there.

5. Environmental factors

Beyond watering and light issues, there are a few other things that can cause houseplants to die. Namely, environmental factors such as temperature and humidity levels. If a room is too cold, or a plant is drying out at rapid speed next to a heater, these could be reasons your plant isn’t doing so hot.

“Avoid cold drafts, hot air blowing on them from the furnace, letting them dry out completely, keeping them overly wet, too low or too high light, and low humidity,” suggests Steinkopf.

If this sounds like a tall order, it is. But by carefully choosing the best location for each of your houseplants (not just sticking them in some random corner), and reading up on what they need, you’ll have a much better chance at keeping them alive and healthy.

“The first thing is always to diagnose what the problem is and find the solution to fix it,” says Steinkopf. “Sometimes that isn’t possible, and it’s OK to have a plant die on your watch. That’s how we all learn. If you made mistakes, learn from them, and most importantly, don’t give up!”

The post 5 Ways You’re Killing Your Houseplants—and How To Stop appeared first on Real Estate News & Insights | realtor.com®.

‘Bargain Mansions’ Reveals One Simple Way To Make a House Stand Out

bargain mansions

HGTV

Tamara Day of “Bargain Mansions” loves taking risks with her renovations. But do such gambles pay off with a flip?

In the “House From the Trees” episode, Day buys a beautiful home in Old Leawood, KS, for $275,000. She plans to put $150,000 into renovations, which means she’s all in for an investment of $425,000. She plans to list the house for $575,000, which promises a hefty return of $150,000.

So what does Day do to merit such a markup? Check out some of her upgrades below, which might inspire some changes around your own abode, too.

Daring colors can make a property stand out

barn
This property came with an adorable barn.

HGTV

This property comes with a small barn in front of the main house. It’s the first thing buyers will see when they drive up, so Day is determined make it a statement piece.

She decides to go bold and paint the barn a dusty pink with white trim. This is an unconventional color for a barn, but Day is sure it’s the right choice.

“This is going to be one of those spaces that totally pops,” Day says.

barn
Tamara Day proves that it’s fun to play with color.

HGTV

While one might consider this a bad sales tactic because so few buyers would want a pink barn, Day points out that this wild feature is sure to attract attention from buyers, which could mean more interest and a better price.

If potential buyers hated the color, they could easily paint the barn. But until then, it’s a fun feature that makes a strong first impression.

Go old school with a classic mantel

fireplace
This fireplace has lots of classic charm.

HGTV

When Day buys this house, the living room fireplace is covered in an ’80s brick veneer. Right away, Day knows that she needs to replace it.

Day ends up finding an old mantel from another old Kansas City home. While an older fireplace design may not seem like a good idea, the new mantel fits the era of the home and brings some elegance to the updated living room.

In the end, Day loves the new mantel.

“This fireplace mantel really brings a touch of classic Kansas City character to this room,” she says.

Open up the staircase with more railings

stairs
The staircase splits up the living room.

HGTV

While Day makes some risky design choices on this home, some of her improvements are a little safer. She notices that the bulky staircase takes up a lot of space on the first floor, so she decides to open up the walls to make these stairs feel less intrusive.

“Having the staircase in the center of the home meant blocking off the formal living space from the rest of the home,” Day says. “I wanted to open it up, putting handrails on both sides of the stairs to the basement, making it feel much more open between the family room and the rest of the home.”

stairs
With the railings replacing part of the wall, this space looks more open.

HGTV

The walls surrounding the basement stairs are removed and replaced with handrails. The railings allow for improved sightlines and make the whole home seem more open.

Cover damaged walls with thick wallpaper

bedroom
This bedroom’s walls needed a refresh.

HGTV

After painting the barn pink, Day wants to continue playing with color throughout the house. However, the master bedroom has green textured walls, which are difficult to paint.

She explains that she could remove the texture and paint over it, but it may be easier to go a different route.

bedroom
With some new wallpaper, this bedroom suddenly looks beautiful.

HGTV

“We can sand it and paint it,” Day says, “but that seemed a little bit boring when, for the same price, we could put some wallpaper in that gave it richness, texture, and a little bit of a fun color.”

She chooses a lavender wallpaper that is just as memorable as the pink paint on the barn. It brightens the room while giving it depth and adding an elegant, feminine style. It’s a bold choice, and definitely one buyers will remember.

Use classic subway tile in a new way

shower
Day uses a traditional tile to make this shower look wonderfully unique.

HGTV

Day plays with risky paint colors and unique wallpaper in this renovation, so it makes sense that she also wants to push the envelope when it comes to her tile design. So in the master bedroom she plans to use a traditional subway tile in a way that’ll stand out.

“I’m always looking for ways to reinvent your basic subway tile,” Day explains.

She uses white subway tiles, paired with a darker tone, to create an alternating vertical and horizontal pattern.

With gorgeous designs and bold colors everywhere from the barn to the bathroom, Day’s latest renovation looks fantastic. She may have to be patient until the right buyer walks in, but we think it will be well worth the wait.

The post ‘Bargain Mansions’ Reveals One Simple Way To Make a House Stand Out appeared first on Real Estate News & Insights | realtor.com®.