gilaxia/iStock
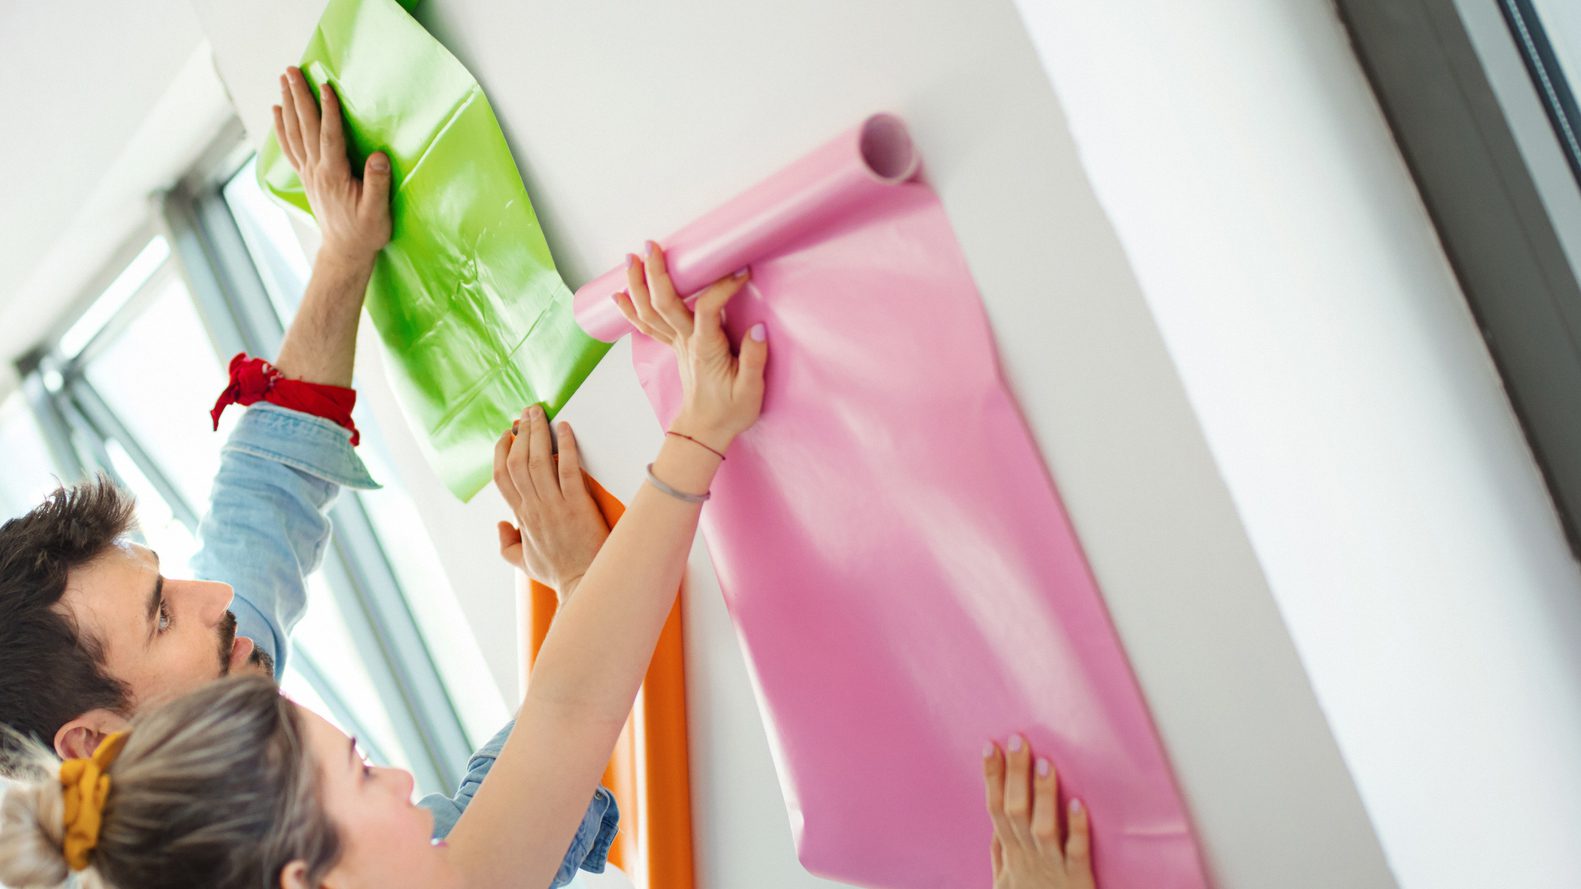
Not just for Grandma’s house, wallpaper is making a big comeback. One problem: Putting up wallpaper is quite the task. And removing the stuff is a whole different headache! The solution? Temporary wallpaper.
One of the main benefits of temporary wallpaper is that it’s, well, temporary. Remove the adhesive on the back, and it goes up—and comes down—with ease, and without leaving a sticky residue behind.
It’s a cheap DIY project without the need for professional installation, which regular wallpaper requires. It’s also perfect for renters who don’t want to damage walls.
But are all the claims of temporary wallpaper too good to be true? In this second installment of our new “Monday Makeovers” series, which highlights popular DIY projects, I tried putting up temporary wallpaper in my own apartment and learned exactly what it takes.
What’s the best temporary wallpaper for you?
There are some papers that require water to activate the adhesive, but for the most part, temporary wallpapers have a self-adhesive. You simply peel off the paper backing and apply it, like a big sticker.
Generally, more expensive wallpapers (like the ones made by Hygge & West, which go for about $65 per 24-by-32-inch tile) are thicker, and will thus flatten more easily on your wall and be forgiving when you accidentally stick a piece and have to pull it up.
Cheaper wallpapers (like this $29.99 option from Target, which covers 27.5 square feet) will still get the job done. But beware of cheap wallpaper that comes in a roll, because with that curl, it’s going to require a little extra work to finesse it onto the wall.

Target
One caveat: Matching the patterns at the edges so that they look like one continuous design can also be tricky. Not sure where to shop?
Sandy Cabelis of Cabelis Interior Design has a few favorite brands: “My go-to companies for great temporary papers are Tempaper and York Wallcoverings.”
Tammy C. Bolden, principal designer and owner of Bold Interior Designs, also recommends Tempaper, as well as Mitchell Black.
“Both vendors have fashion-forward designs that are easy on the budget,” she says.
How to prep your wall and wallpaper
The first thing you’ll want to do is wash your walls. This will make your paper stick better.
Just make sure you wash 24 to 48 hours before you start wallpapering—long enough for the moisture to evaporate without accumulating another layer of dust.
Next, measure how tall and wide your wall is, and cut pieces of paper that will cover your wall, plus a few inches to spare (this can be trimmed later with a utility knife or X-ACTO blade). Then lay your pieces on the floor so you can plan where you will put them.
A test run on the floor is particularly important when lining up your wallpaper pattern. For example, if you have a wallpaper design that features florals, laying out each strip of paper on the floor will help you match up each flower in the design.
Another great reason: You can plan where you want the design elements to land.
Maybe your wallpaper design features a large tree, which you want centered in the middle of your wall. You can pick out the section you want to feature in the center and work outward from there, cutting out the pieces that work on either side.
“Start with the area of most importance and work your way out,” says Cabelis.
Applying the wallpaper
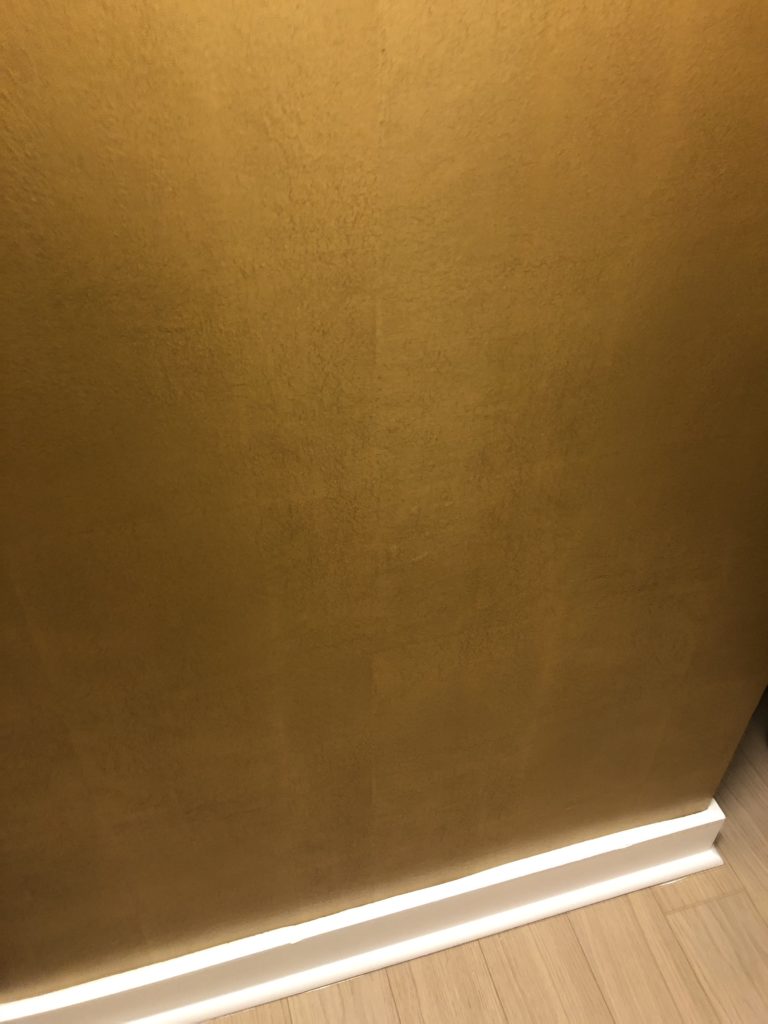
I decided to add temporary wallpaper to a wall in my walk-in closet, and chose Devine Color metallic gold paper ($30, Target).
I measured the wall, cut two long strips of wallpaper that fit my measurements, and laid them on the floor. Then I grabbed a step stool and ruler and started applying the paper.
I started in the top left corner of the wall, peeling off just enough backing so that the very top of the paper would stick to the very top of the wall. Then, I slowly pulled down the paper (small section by small section), while flattening it with the ruler to remove air bubbles and wrinkles.

Jillian Pretzel
I found it was much harder to apply the paper at the top of the wall, since I could barely reach it, and didn’t feel I had full control of where the paper would stick.
Since I’d removed so much of the backing, I ran the risk of getting wrinkles. Even after pulling up the wallpaper sections a few times and reapplying, I still had a few small air pockets I simply had to surrender to.
My wallpaper job isn’t perfect, but people probably wouldn’t notice the imperfections unless they were really looking for them.

Jillian Pretzel
Once the wallpaper was down, I used an X-ACTO knife to trim the bottom and create a clean finish. It’s not perfect, but it works.
Putting up these two strips took me about 15 to 20 minutes, so if you’re planning to wallpaper a larger area, plan to take breaks, as your arms may get tired. Mine sure did!
Jillian Pretzel
Wallpaper finishes
For this project, I didn’t run into any windows, AC units, or any other obstacle you might find on a wall. If your wallpaper does run into one, just roll the paper down as far as you can go, and use your X-ACTO knife to cut in line with the top of the object.

Jillian Pretzel
So, is temporary wallpaper worth DIYing?
One of the biggest questions I had when starting to put up my temporary wallpaper was: “Could it really be so easy?”
My answer: yes and no.
For one thing, putting up this wallpaper so that it looks perfect is a challenge. And although my wallpaper was a solid color, I imagine that lining up patterns would add yet another level of complexity.
I also learned that there is, in fact, some risk of damaging the walls.
Temporary wallpaper manufacturers, like Chasing Paper, recommend using the product on painted surfaces with a satin or semigloss finish. On a flat, matte paint finish, the adhesive could take off some paint when you remove the paper.
Still, I was pleasantly surprised by how quickly I was able to go from unrolling the paper to the finished wallpaper (about 30 minutes for this small project). All in all, I’d say this was time and money well-spent!
The post Is Temporary Wallpaper as Easy as It Seems? A DIY Reality Check appeared first on Real Estate News & Insights | realtor.com®.
No comments:
Post a Comment